Disclaimer: This post contains affiliate links to handpicked partners, including tours, gear and booking sites. If you click through or buy something via one of them, I may receive a small commission. This is at no extra cost to you and allows this site to keep running.
This climbing Kilimanjaro trek guide covers everything you need to successfully summit the highest mountain in Africa on the Lemosho Route.
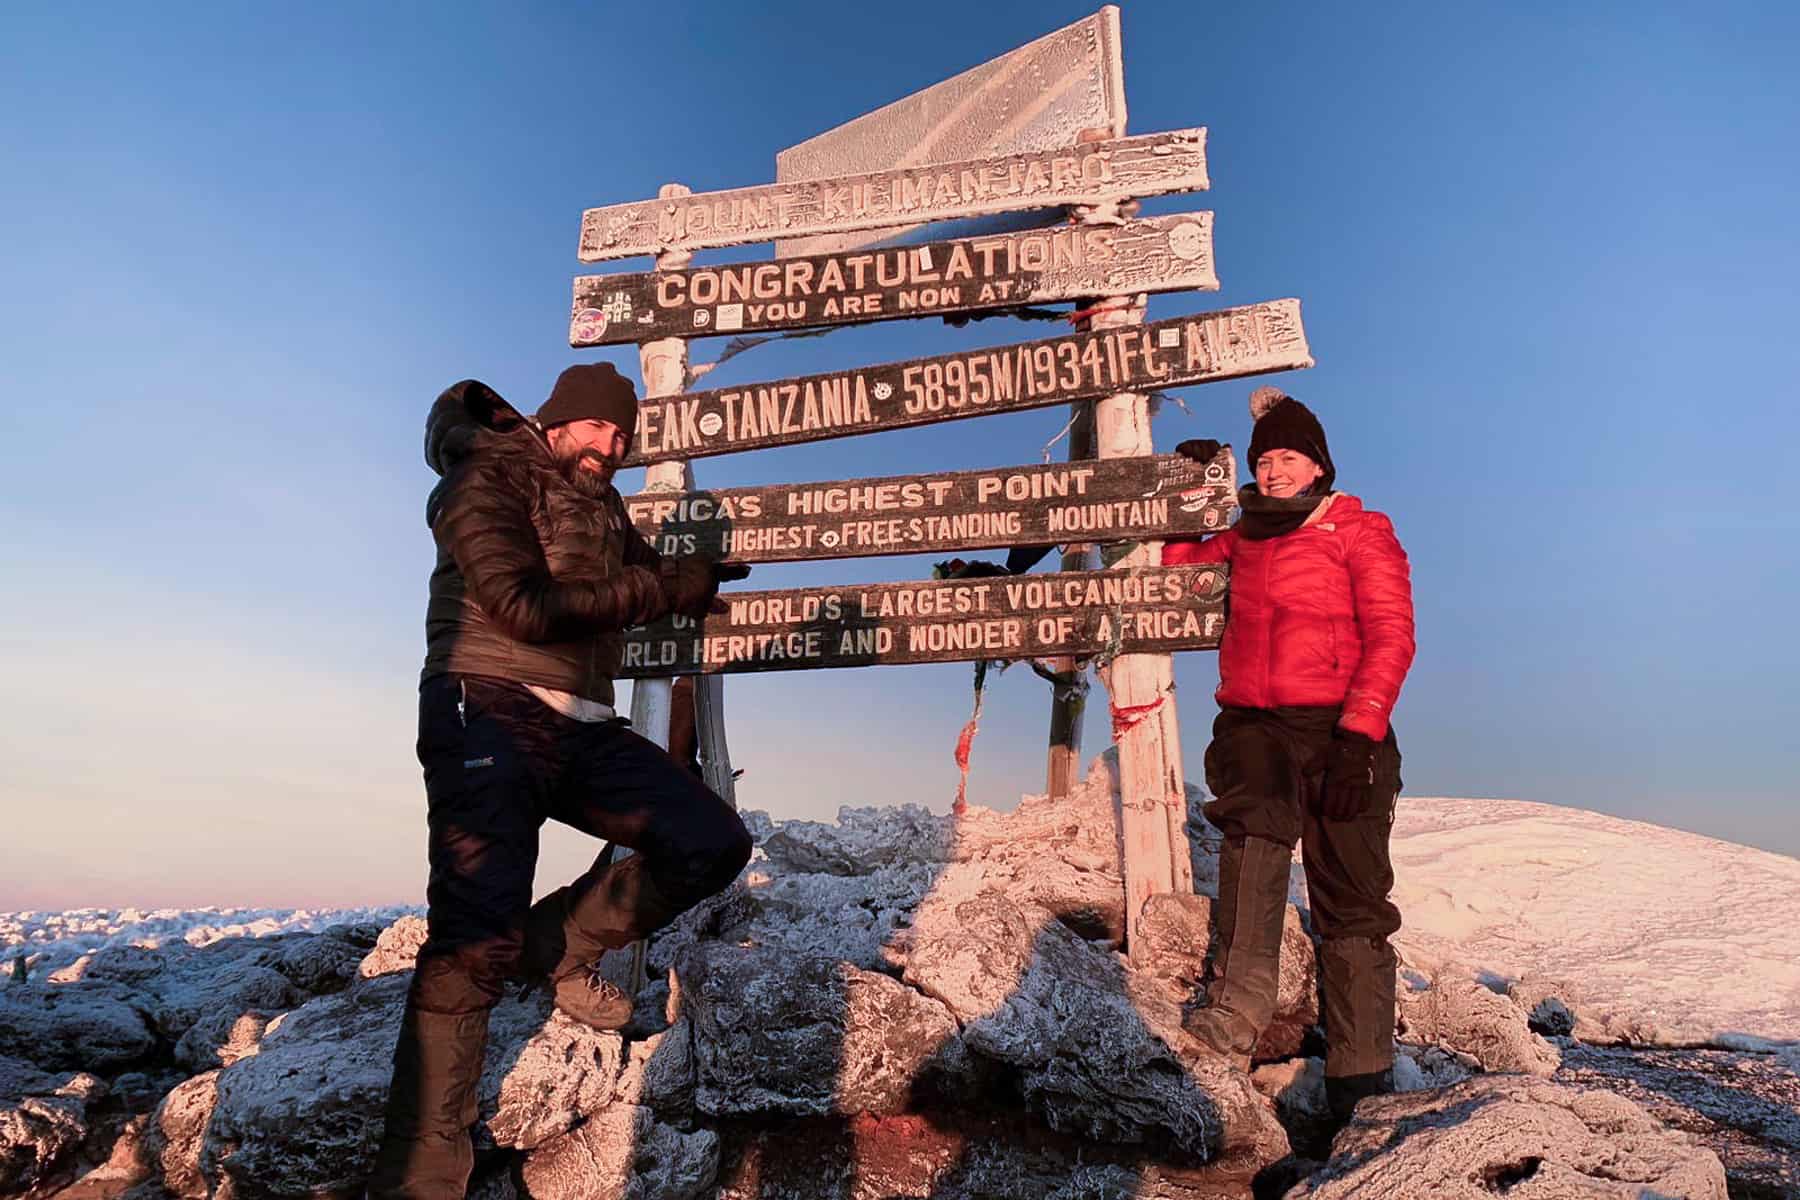
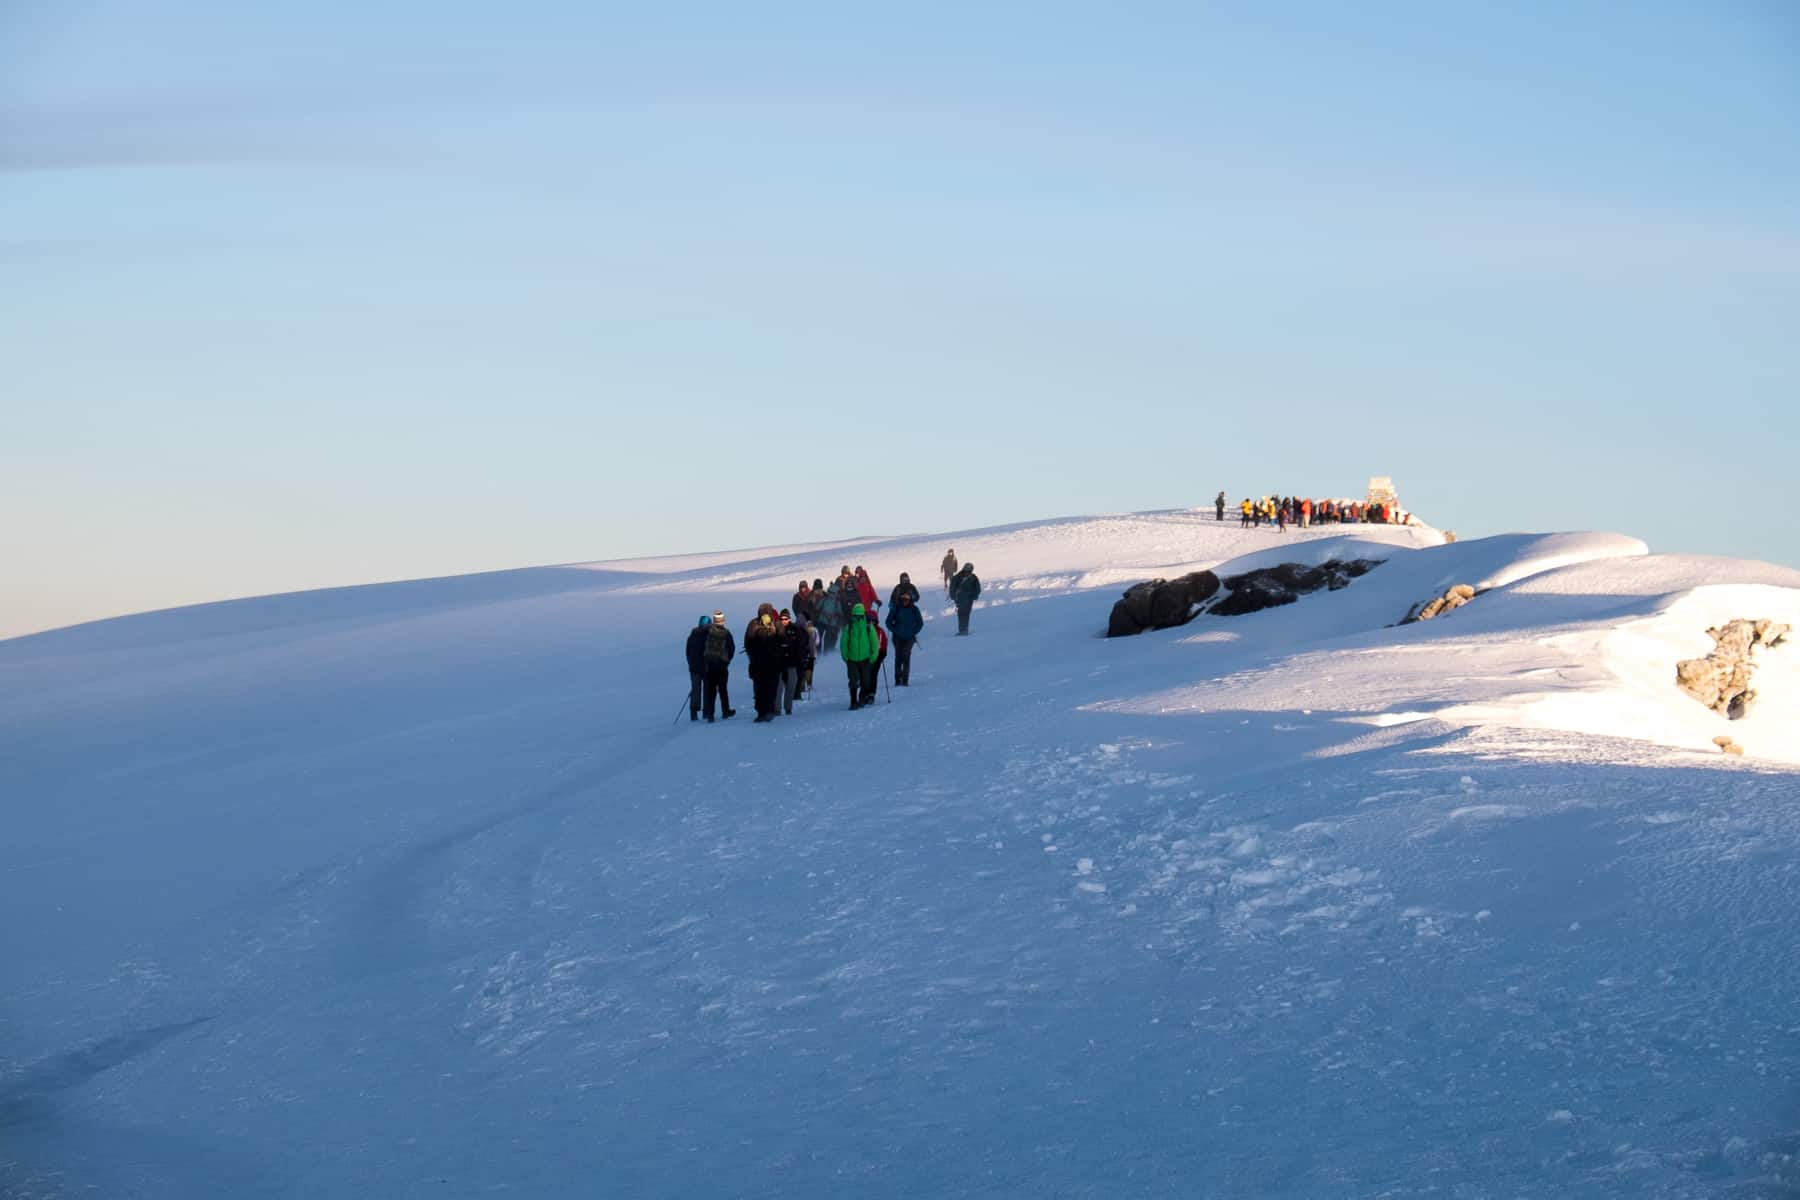
Base Camp’s midnight black air is tinged with brisk cold, and the murmuring of unspoken nervousness turns into the sound of precisely paced footsteps on a dusky wall of a volcanic mastiff, decorated in a coil of headlamps. Climbing Kilimanjaro, an unpredictable and often unforgiving journey through the elements, comes down to this singular, extraordinary moment in time – reaching the highest point on the African continent.
By 6:30 am we emerge upon a plateau lit by the yellowing blue of early dawn, covered in the echoes of exhausted cheers, boots on crunching snow and the whirl of treacherous icy winds. Uhuru Peak, where the famed wooden sign congratulatory places you at Kilimanjaro’s Summit, is a fuzzy blur through frosty tears.
We’ve trekked up the bouldering mastiff for seven tiresome hours and sobbing is the natural release. I flitter simultaneously between feeling painfully fatigued and speechlessly overjoyed – an incredible odyssey of emotions standing on the magnificent snow cone of the Kibo volcanic crater and looking out across the world.
Climbing Kilimanjaro Trek Guide – Successfully Summit Africa’s Highest Mountain
Article Contents
- The Honest Guide to Climbing Kilimanjaro
- Trekking Kilimanjaro – Technical Questions Answered
- Kilimanjaro Routes – Which One to Choose?
- Choosing a Kilimanjaro Trek Tour
- Preparing and Training for Kilimanjaro
- Kilimanjaro Trekking Tips
- Overall, Is the Kilimanjaro Climb Worth It?
- What to Do After Climbing Kilimanjaro? Beach and Safari
The Honest Guide to Climbing Kilimanjaro
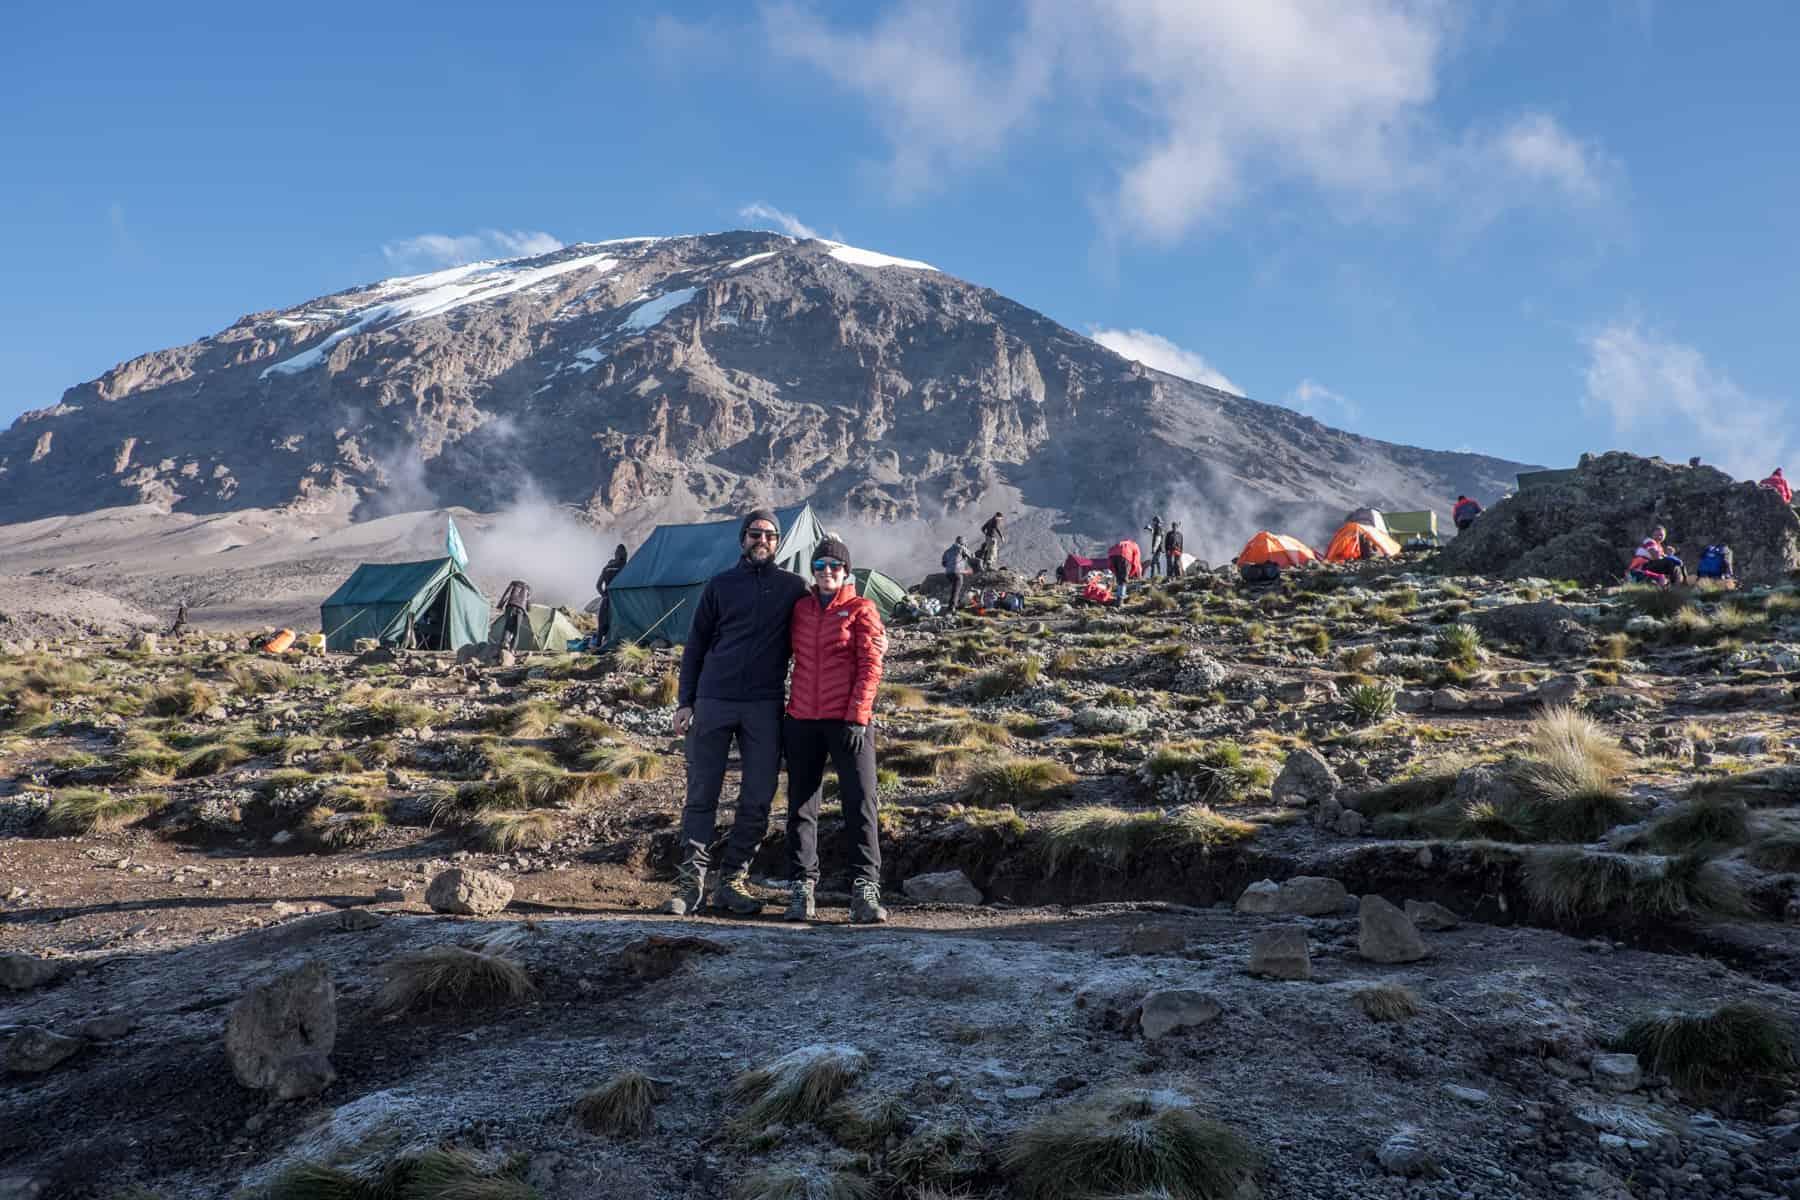
Mount Kilimanjaro is unsurpassable. Africa’s tallest mountain at 5,895 meters (19,340 feet) is Tanzania’s centrepiece and an icon of the continent. The proclaimed ‘Roof of Africa’ is the highest single freestanding mountain in the world and attracts those wanting to climb it, stand upon the great extremities of a dormant volcano and witness views extended from the sky.
There’s no denying the trek to Kilimanjaro is demanding work and an endurance test that is not the equal sum of exhausting and euphoric.
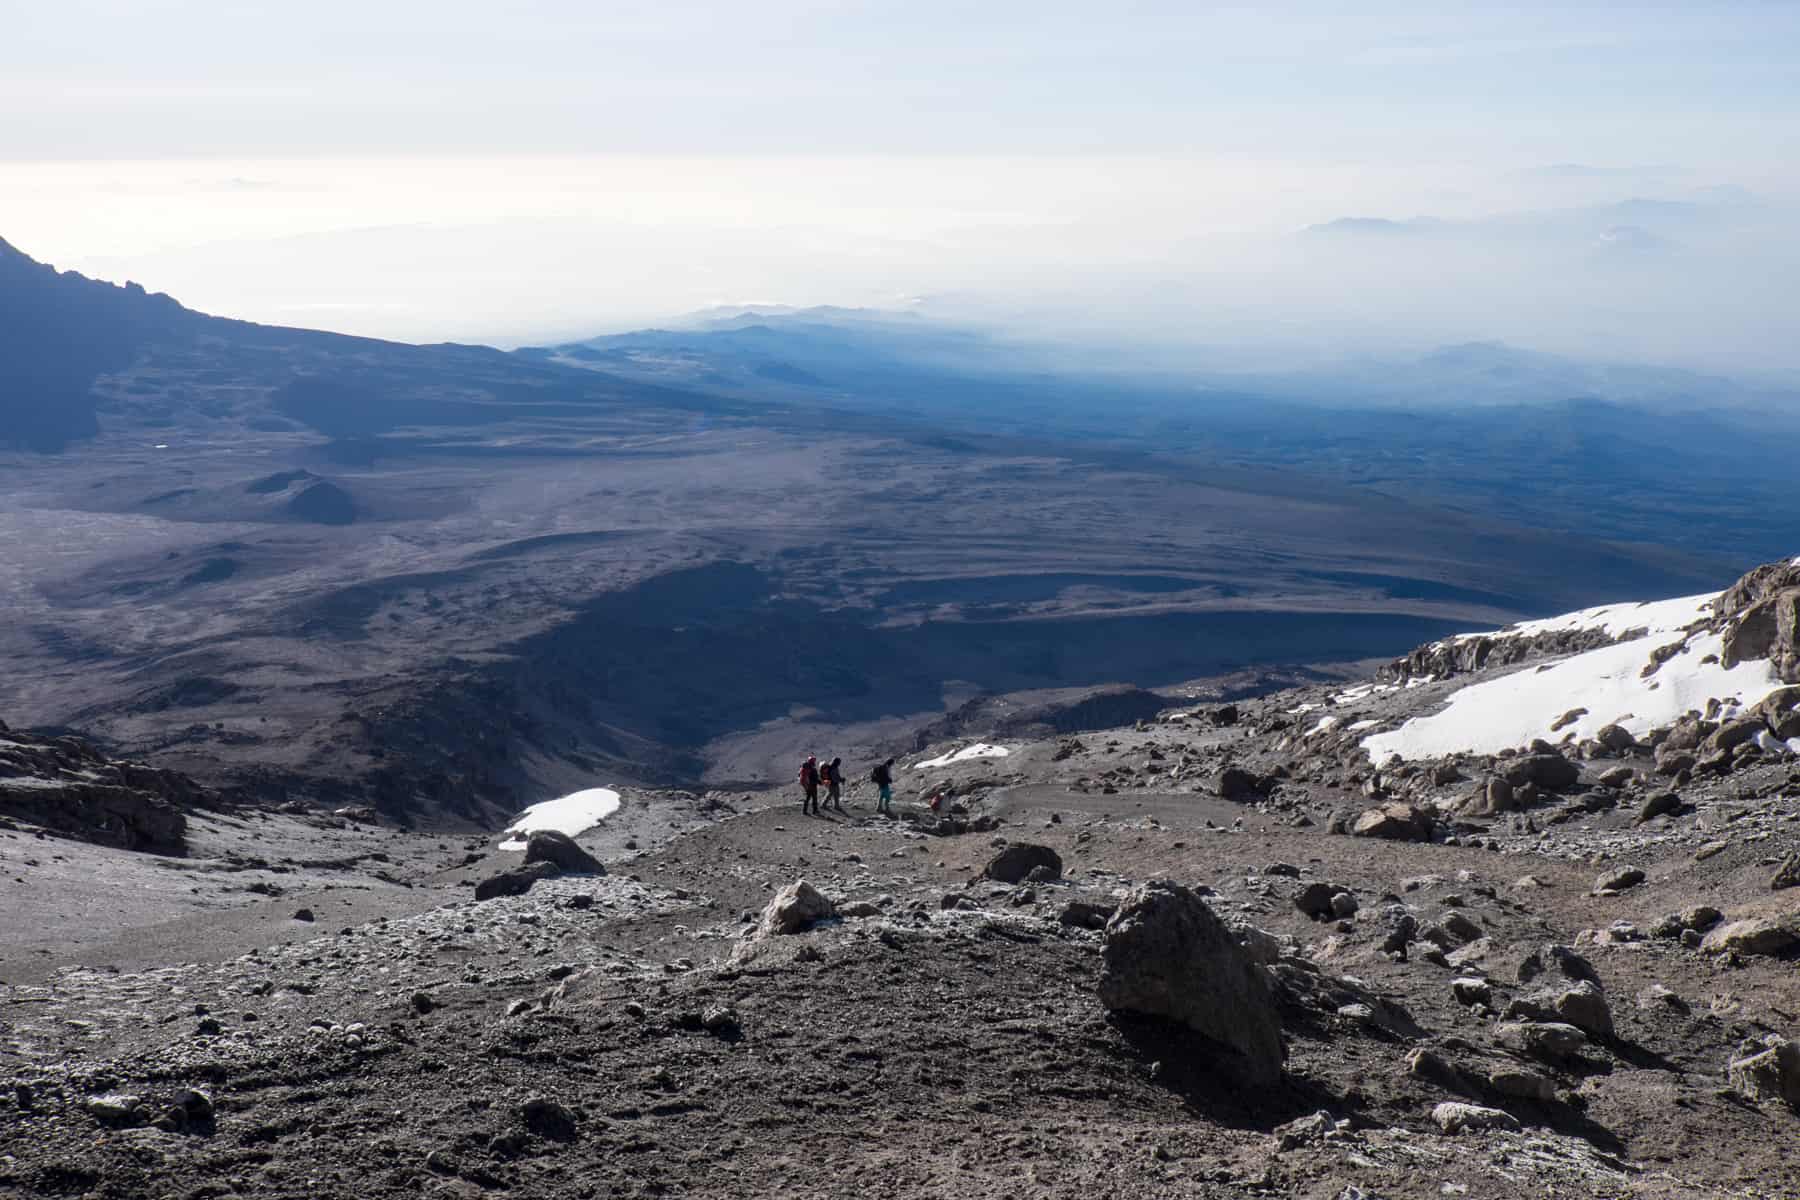
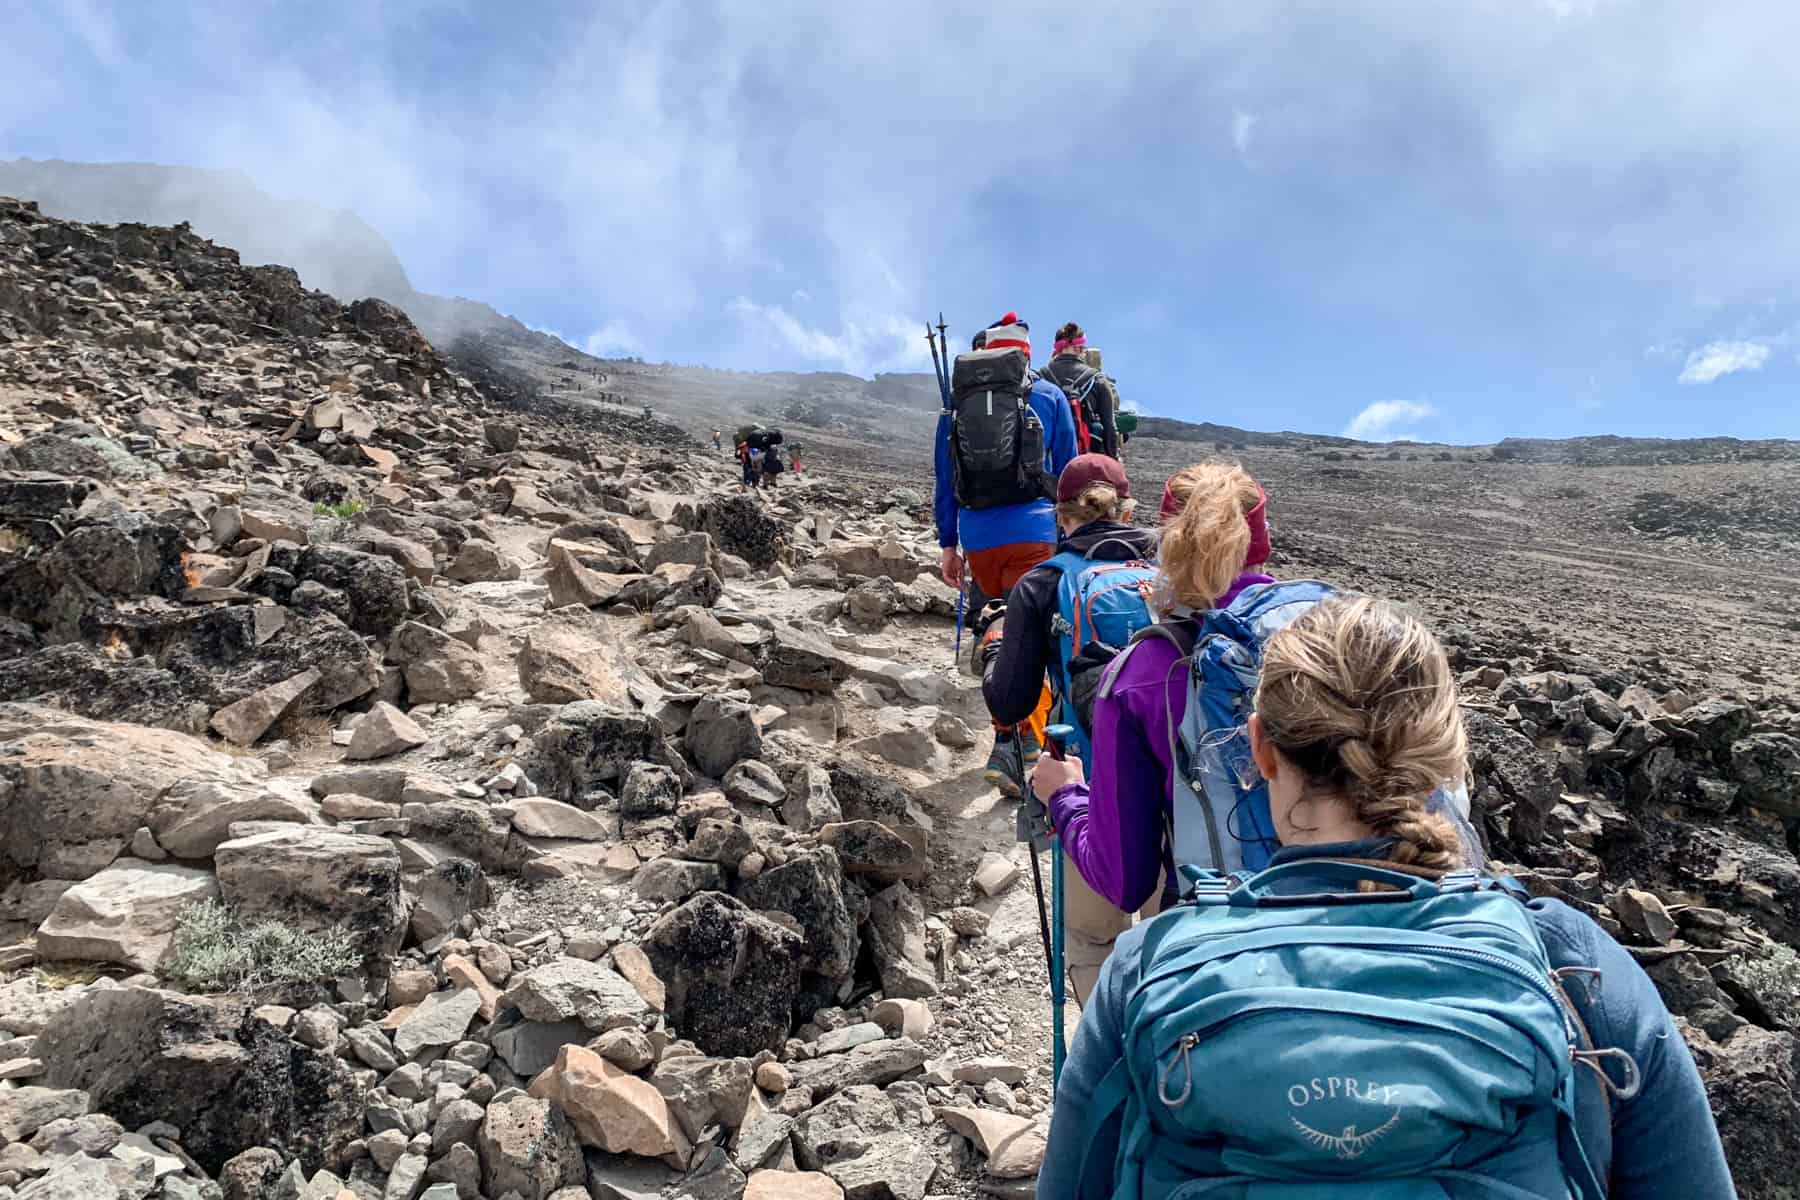
Each day of climbing Kilimanjaro takes you slowly through a layered, five-tier geographical system from warm, dense rainforest to wind piercing desolate rocky desert hinterland to the snow-bound, glacier-capped crater summit with bitter minus temperature chill.
Summit night is the most gruelling and painful thing you will likely ever undertake on a commercial climb, yet every slow step that bears the weight of your lagging body is one closer to the goal and disappears as soon as you reach that famed board on the peak of the crater top. Agony fades in minutes with the awe and accomplishment it brings.
The Kilimanjaro trek is one that is only fully understood once completed – some aspects of the participation can never be so accurately put into words. The overall experience is achievable with the right planning and a responsible team of people and makes an inconceivable life goal a lifelong memory.
I’m here to ensure you have everything you need in this mammoth Kilimanjaro guide, following my journey on the Lemosho Route. All things to thoroughly plan your trip, manage your expectations, calm your nerves and get you ready to complete your biggest and greatest adventure, but with an honest dose of caution and reality.
READ MORE: Trekking 8 Days on the Kilimanjaro Lemosho Route.
Trekking Kilimanjaro – Technical Questions Answered
Many questions dominate your mind before deciding on climbing Mount Kilimanjaro, and that’s normal. Safety should be at the fore, as well as understanding the reality of the undertaking to prepare appropriately. Ego has no place on this mountain.
How Difficult Is the Kilimanjaro Trek?
Climbing Mt Kilimanjaro is difficult and requires a reasonable degree of physical fitness, like any multi-day hike at altitude. It helps if you have hiked before and have trained beforehand, especially to build some stamina.
Despite a high, rocky wall climb and steep sections, no technical climbing skills are needed, such as ropes, harnesses and crampons.
Kilimanjaro is an intense and compounded expedition set to a disciplined pace rather than a gentle ramble through a national park. Everyone in my group found different days difficult, and what is a breeze for one is the worst day for another. Overall, with each day carefully paced, it’s more physically exhausting because of altitude, rather than distance, and you have no control when your body decides what to make of a particular trail that day.
Summit night on Kilimanjaro is tough and incomparable to anything I have ever undertaken. It was the most challenging, gruelling element of a trek I’ve ever experienced. A 1500m ascent that takes over six hours in darkness and potentially treacherous conditions, followed by a 3000m journey down to a lower base camp at a safer altitude, ravages your body since you will be trekking for around 16 hours on this day.
Anybody who says summit night and day is easy is lying, and it’s disingenuous not to be upfront about how wreaking that part of the trek is.
How Long Is the Kilimanjaro Hike?
Depending on your chosen route, it can take six to nine days to climb Kilimanjaro, from the starting gate to leaving the national park.
Tackling this climb any quicker should be avoided – treks are precisely paced and planned over more extended periods for your safety in adjusting to the altitude, having plenty of rest, and being able to climb and then sleep at lower levels.
How High Is Kilimanjaro & How Much of It Do You Climb?
Kilimanjaro’s Uhuru summit – your ultimate goal – stands at 5,895 meters. At its lowest level, Moshi is 700m above sea level.
A small bus dedicated to your trek team and your gear drops you off at Londorosi Gate at 2250m to sign in before transporting you to your starting gate. From the start gate to Summit, you climb the entire way.
I started at Lemosho Gate (for the start of the Lemosho Route) at 2100m, taking seven days to safely climb a difference in altitude of around 3,795m.
When Is the Best Time to Climb Kilimanjaro?
There are two windows deemed to be the best time to climb Mt. Kilimanjaro, which correspond to the driest months of the year, and with warmer temperatures:
- December to March
- June to October
The busiest times for trekking groups within those two windows are:
- January to February
- August to September
The wettest months are:
- April and May
- November
There is no particular ‘best month’. Friends who trekked two months before me in December faced rain every day yet lucked out with a gorgeously clear, blue-skied, sunny Summit. In February, I experienced daily trails in sunshine and light chill and spontaneous showers, yet Summit was a treacherous and icy -20 degrees.
In short, even in the dry season window you are more or less guaranteed to experience all four seasons trekking to Summit.
How Cold Can It Get on Kilimanjaro?
The mountain, with its five different geographical systems, means you’ll pass a full spectrum of humid tropics to minus temperatures, regardless of what time of the year you visit.
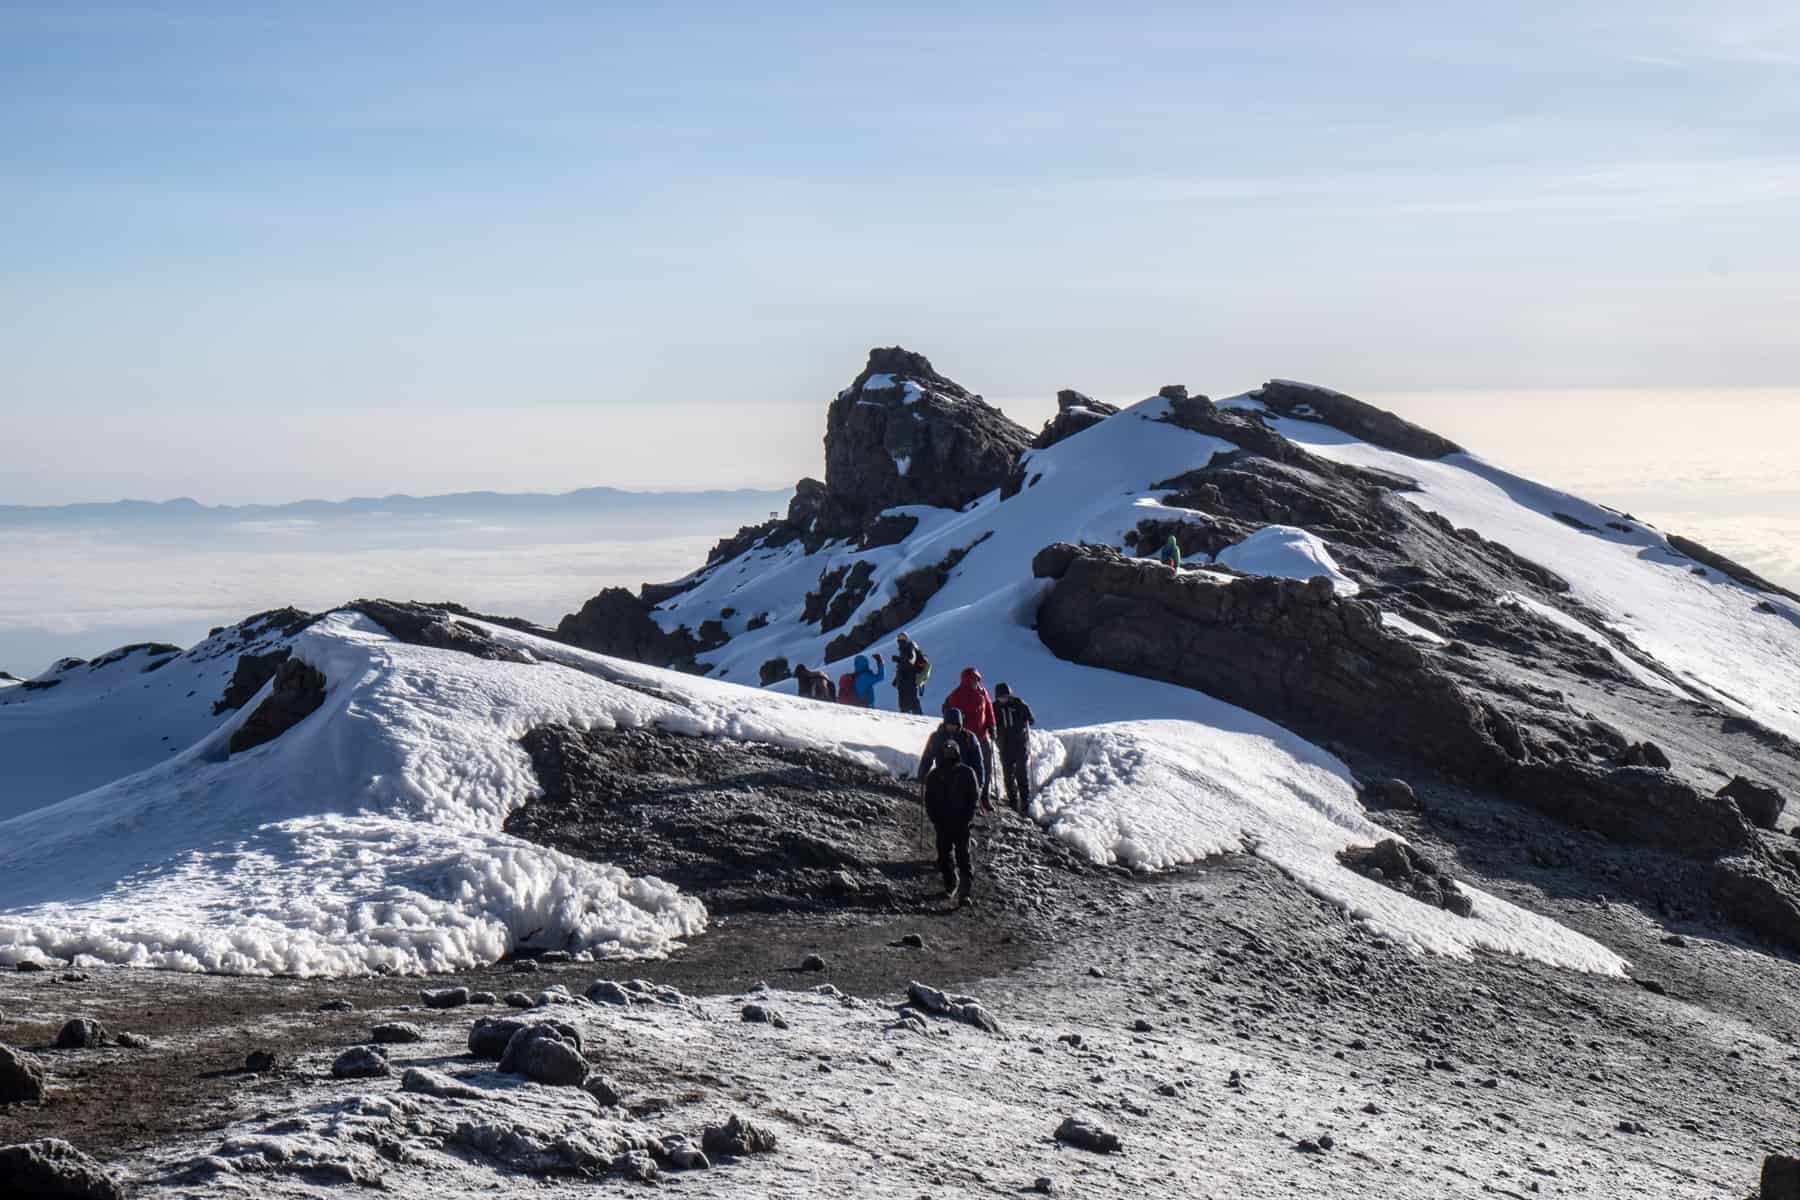
Nights are chilly and sometimes in the low minus figures, even if the day is relatively mild. The Uhuru Point Summit can get as bitter as -20 degrees. We experienced -10 degrees with -10 degrees wind chill on the very top.
The Uhuru Point Summit of Mt. Kilimanjaro.
How Dangerous Is Kilimanjaro?
There’s no denying trekking Kilimanjaro carries with it a certain streak of dangerous territory since it is an extreme altitude mountain trek. And while not technical, it’s sheer height levels it on the side of heavy precaution.
While ‘how many people die on Kilimanjaro?’ is not the thing to Google before you go, it does pay to be aware of the low ratio of extreme cases concerning the overall amount of people who trek.
Over 30,000 people trek Kilimanjaro every year. Out of that, park reports state around 1,000 evacuations from the mountain and an average of ten deaths, attributed to Acute Mountain Sickness (AMS), known more commonly as Altitude Sickness.
With the right trekking group and guides, your health and wellbeing will be monitored every step of the way, including being brought down to a lower altitude quickly if you do get sick. You will soon notice when your guides are in high alert mode and how instantly they can detect changes in the behaviour and feeling of trekkers. They are your lifelines to a successful Summit.
Kilimanjaro Routes – Which One to Choose?
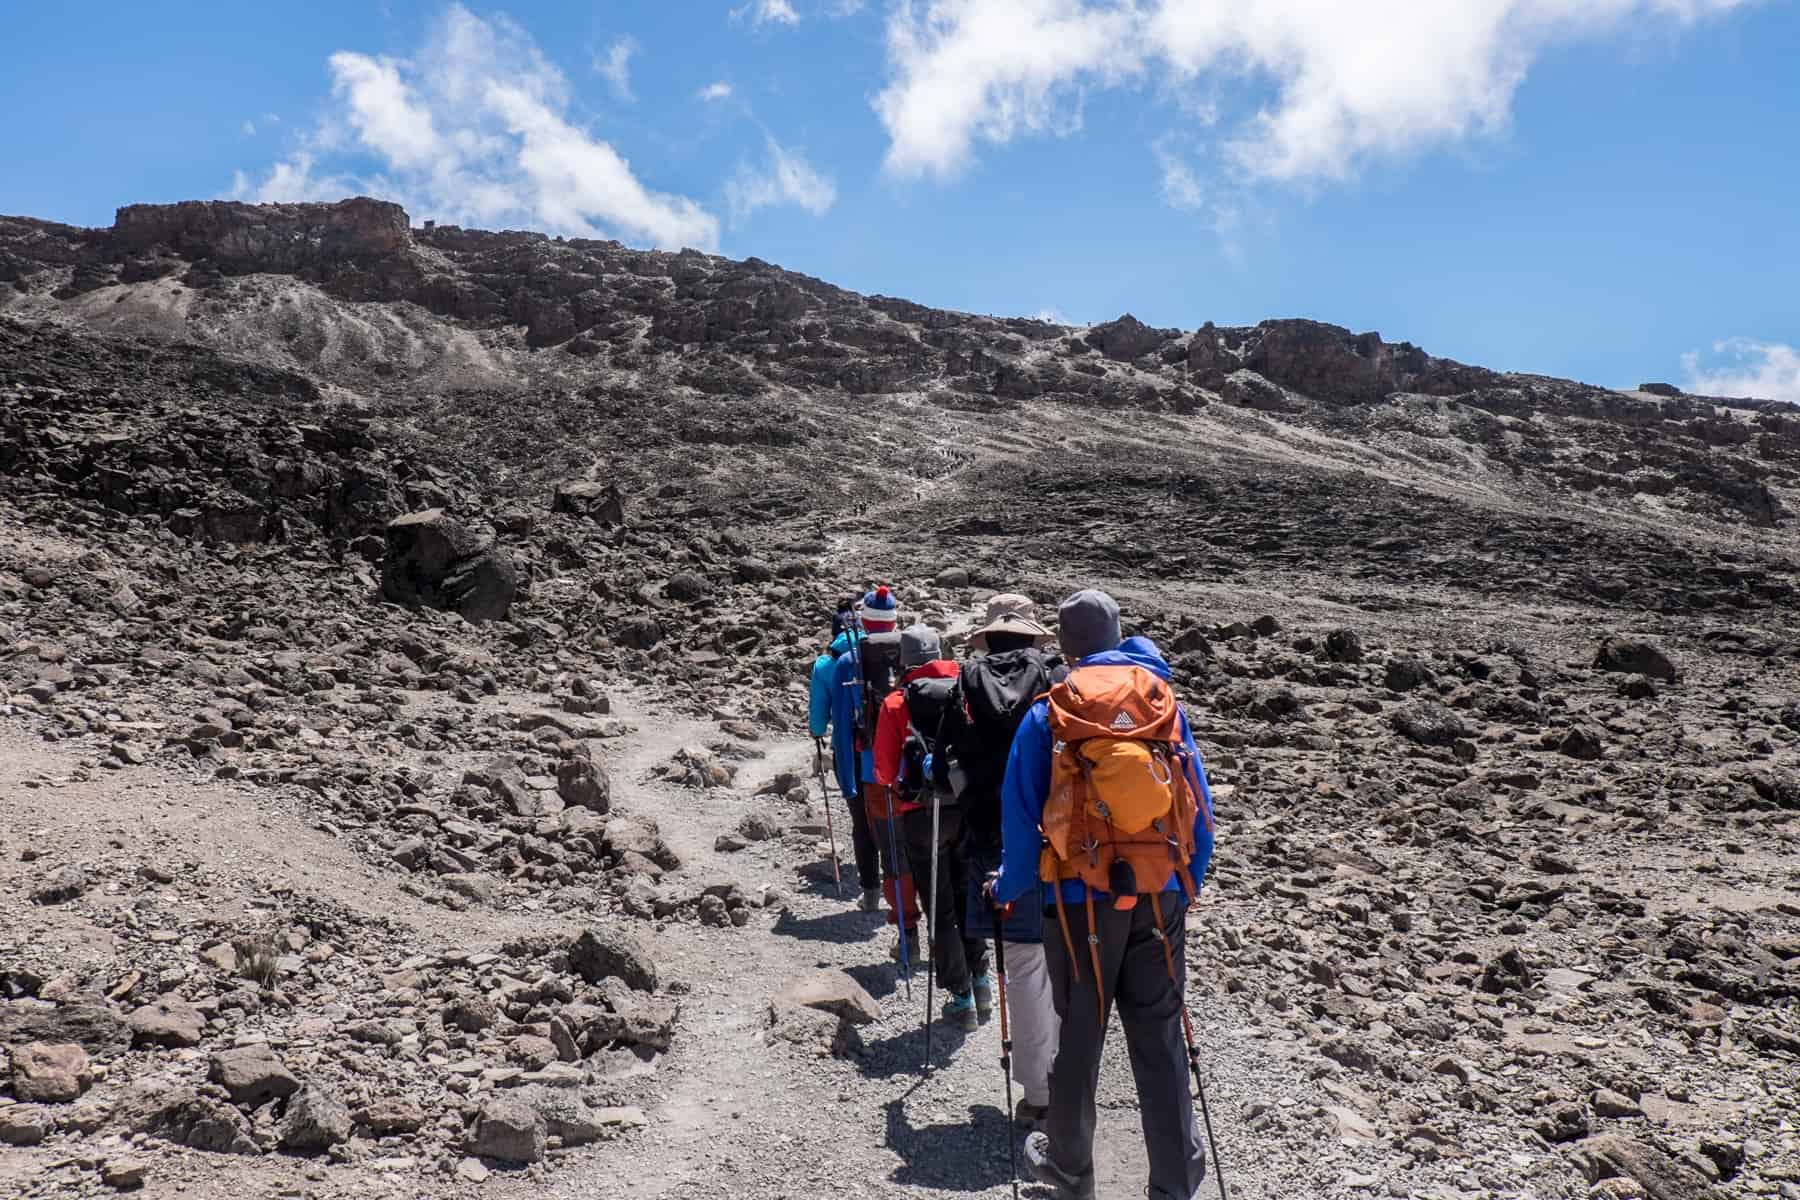
There are seven ways to get up Kilimanjaro, passing through the five ecosystems from forest to moorland, alpine desert, and rocky hinterland to ice glaciers and snow at the Summit.
There are four commercial Kilimanjaro routes you will hear most about, each with varying levels of difficulty and comfort, the means to acclimatise and the average success rate, alongside the desire to hike in a shorter amount of time or without the crowds.
- The Marangu Route is known as the “Coca Cola Route” because it is the oldest and most trodden trail. It is also the only route to offer hut accommodation instead of camping.
- Days trekking: 5 days
- The Machame Route, a six-day circuit affectionately known as the “Whiskey Route” because it’s a tough challenge, while also giving a better window of time for acclimatisation by hiking to high altitudes and sleeping low.
- Days trekking: 6 days
- The Lemosho Route is considered one of the most beautiful trails, with fewer people, and a higher success rate of reaching the summit due to better altitude acclimatisation.
- Days trekking: 8 days
- The Rongai Route begins on the side of Kilimanjaro close to the Kenyan border and descends via the Marangu Route. Considered to be the most remote and gentle in its ascent, it’s also the only Kili route where you get to camp beside the only lake on the mountain.
- Days trekking: 6 days
Looking for a comprehensive overview of which route to choose? READ MORE: How to Choose the Best Kilimanjaro Route
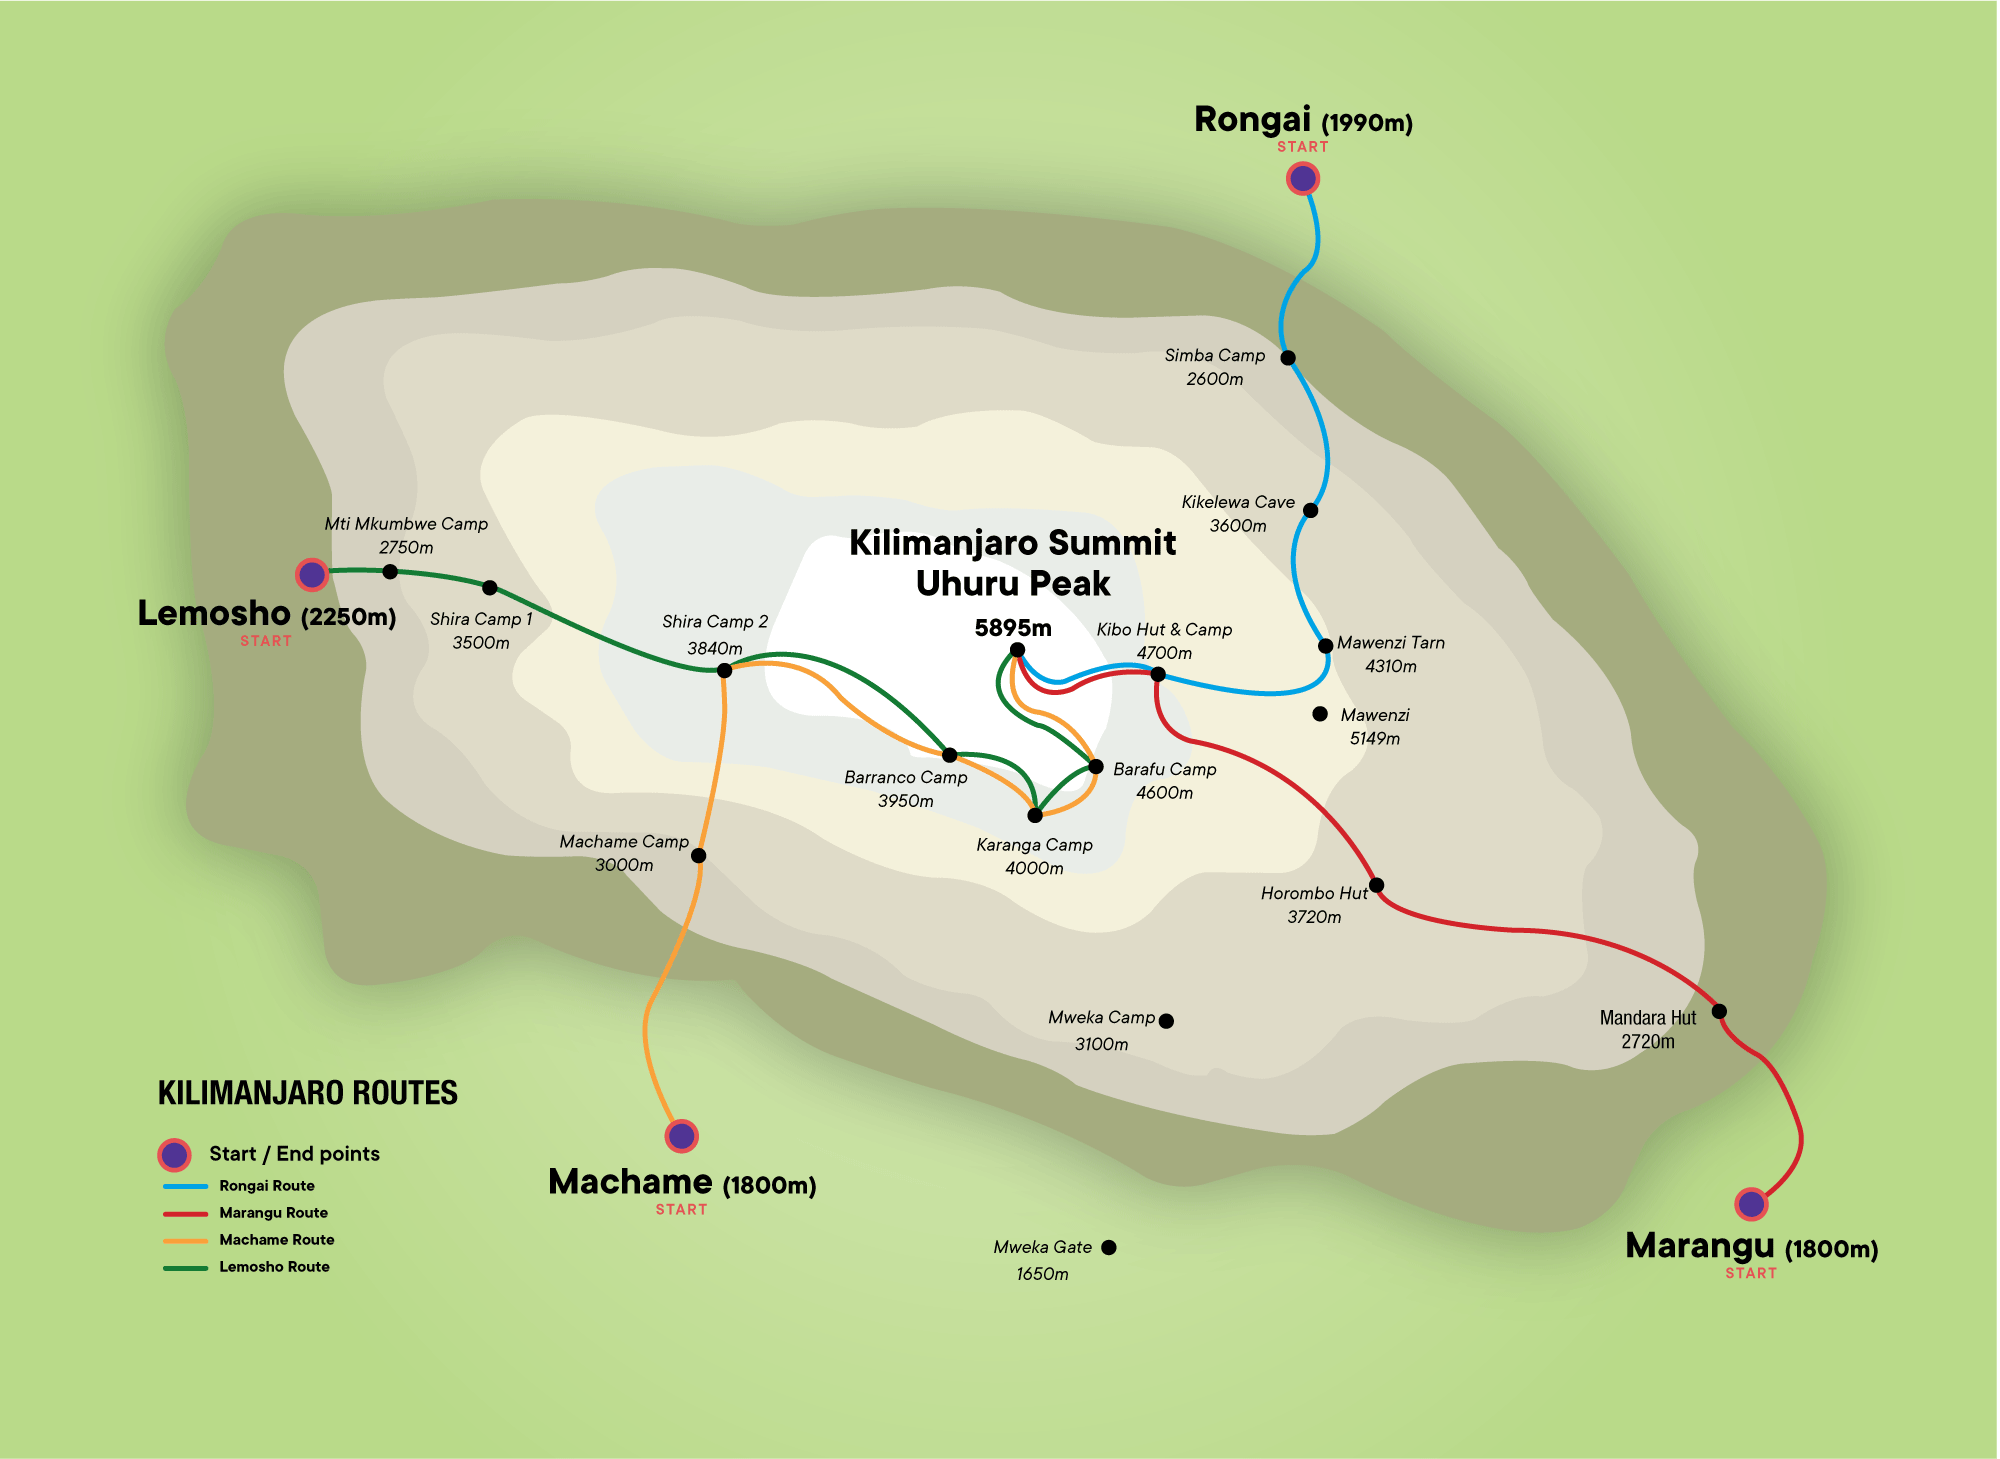
The four main Kilimanjaro trekking routes.
What Is the Easiest Route up Kilimanjaro?
I would choose between Macheme, as it is the most set and practised route, and Lemosho because of the extra time for acclimatisation, which is essential for summit success.
Choosing a Kilimanjaro Trek Tour
Now you have a better idea of which route you want to take, the next most crucial decision is with which tour operator to book your trek. With dozens of companies out there running variations of trips for hiking Kilimanjaro, it can be overwhelming.
Here are some questions you should be asking and what kinds of things you need to research and know before making your final choice.
Ethical Treatment of Guides and Porters
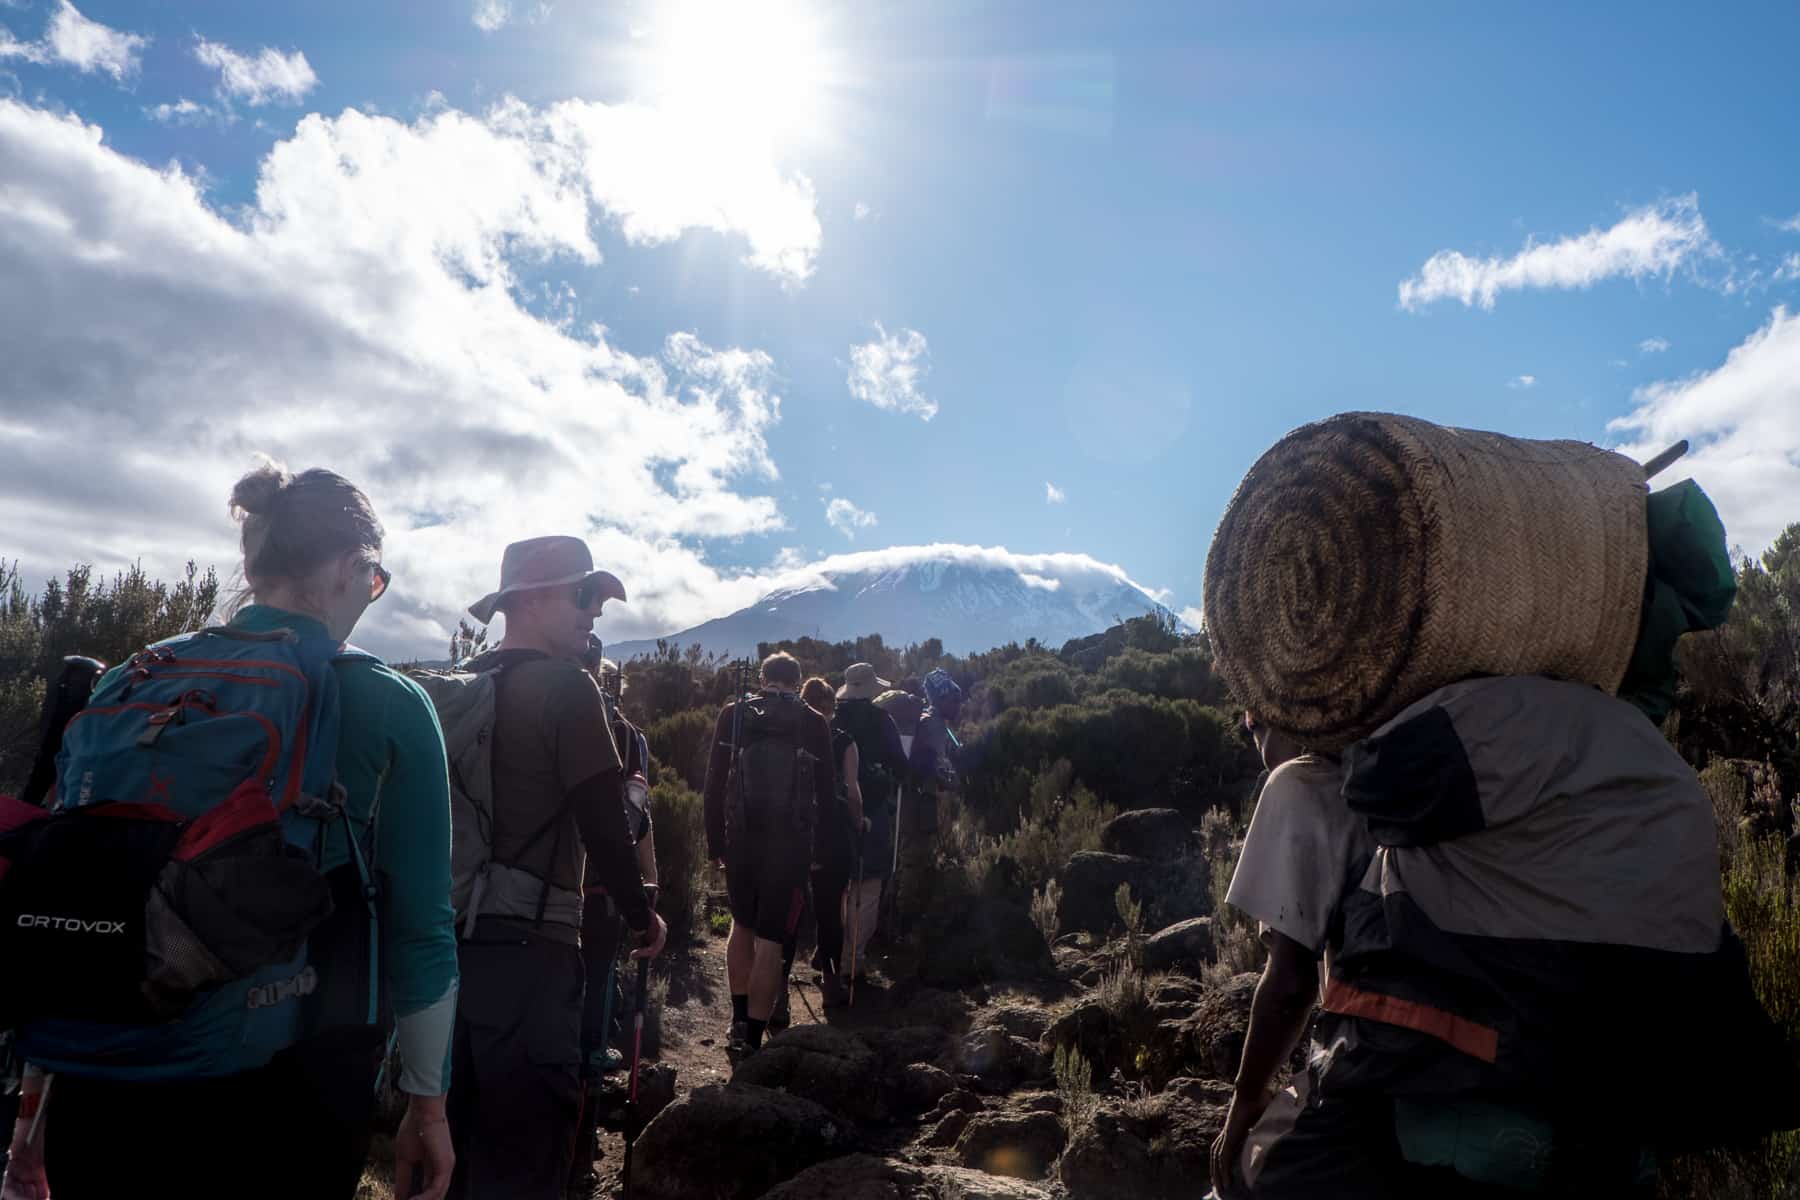
Choosing a company with the right ethical approach to the work practices, conditions and well-being of its guides and porters is paramount. Are they paid well? Are they able to climb with the proper footwear and clothing? Are there enough porters for the size of the group, or are they being made to carry more than they should?
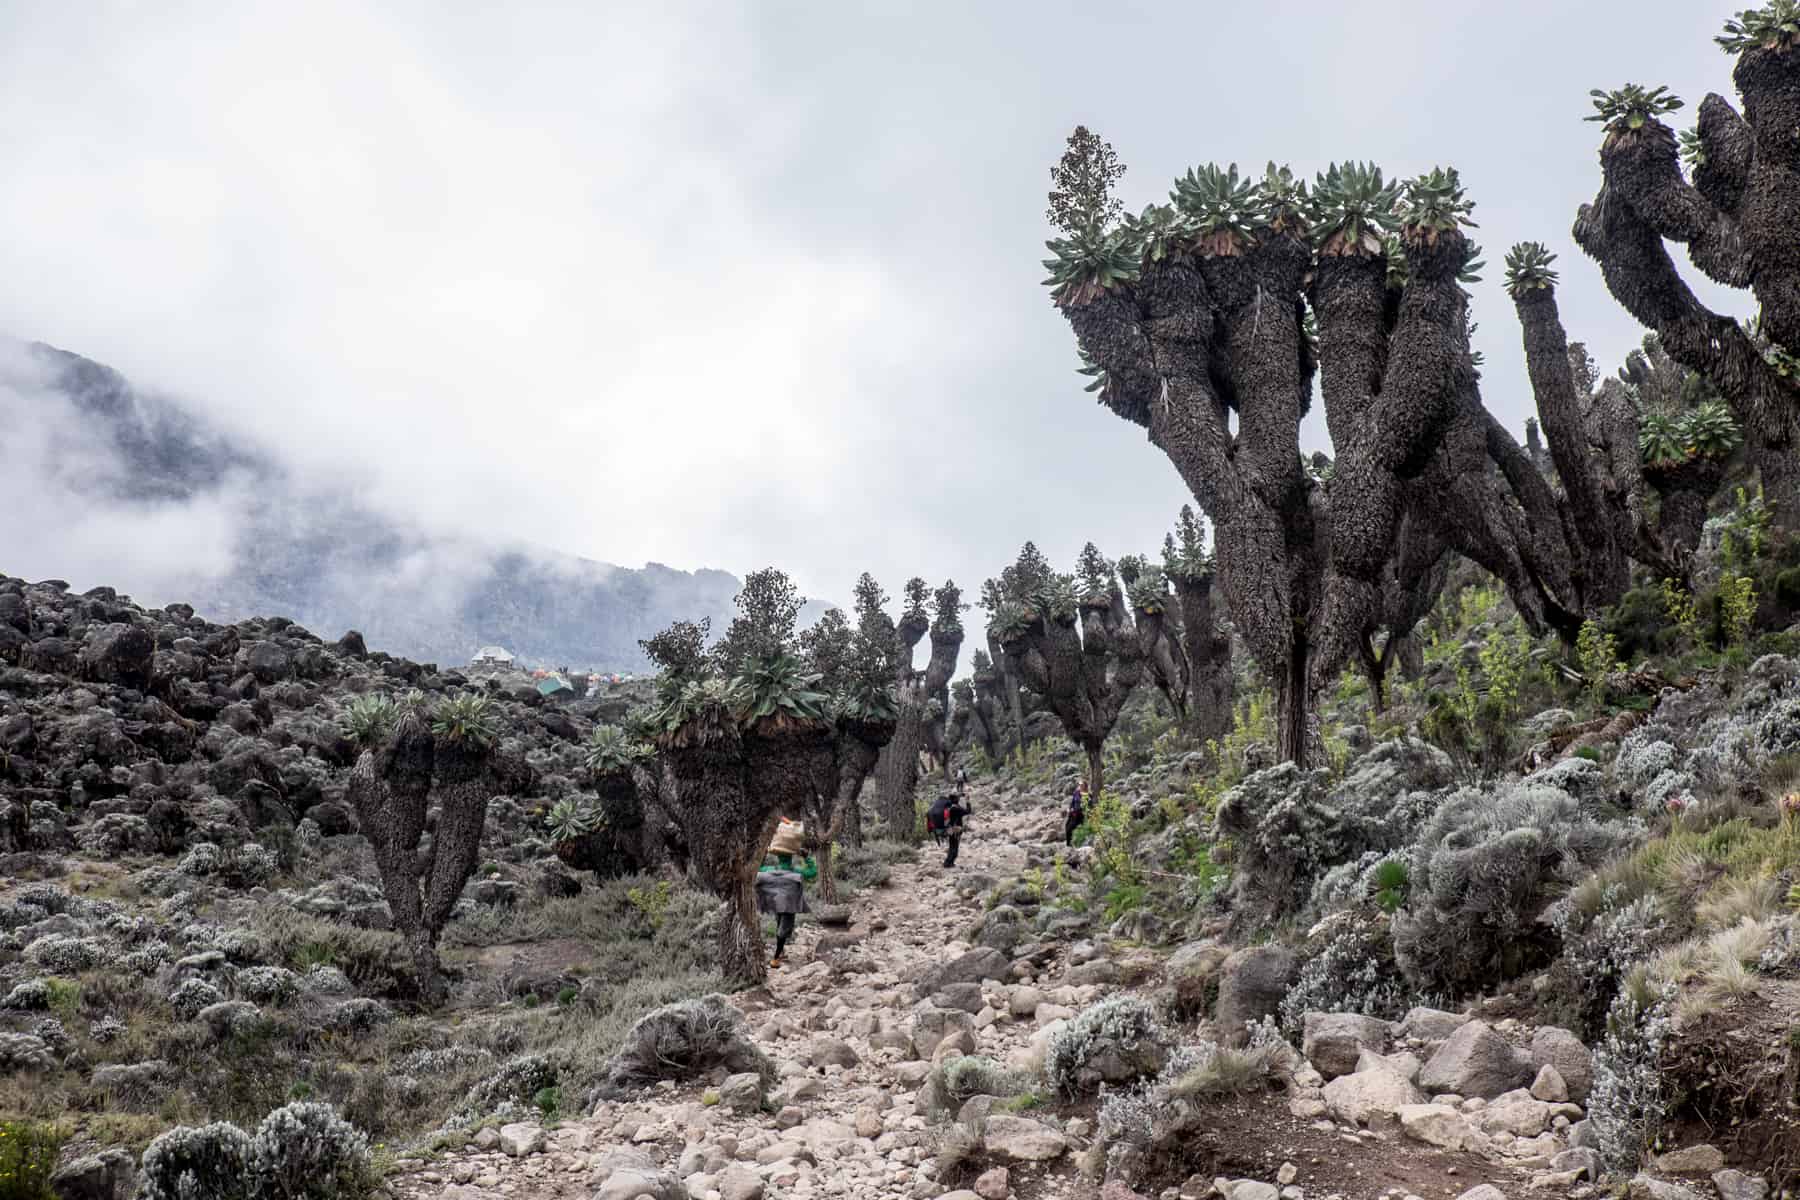
You’ll see plenty of porters without decent gear or pushed physically beyond healthy means. Many trekkers donate some of their equipment and clothing to the porters after the trip. Make sure your tourism dollars contribute to a decent wage and fair treatment. These guys are absolute warriors.
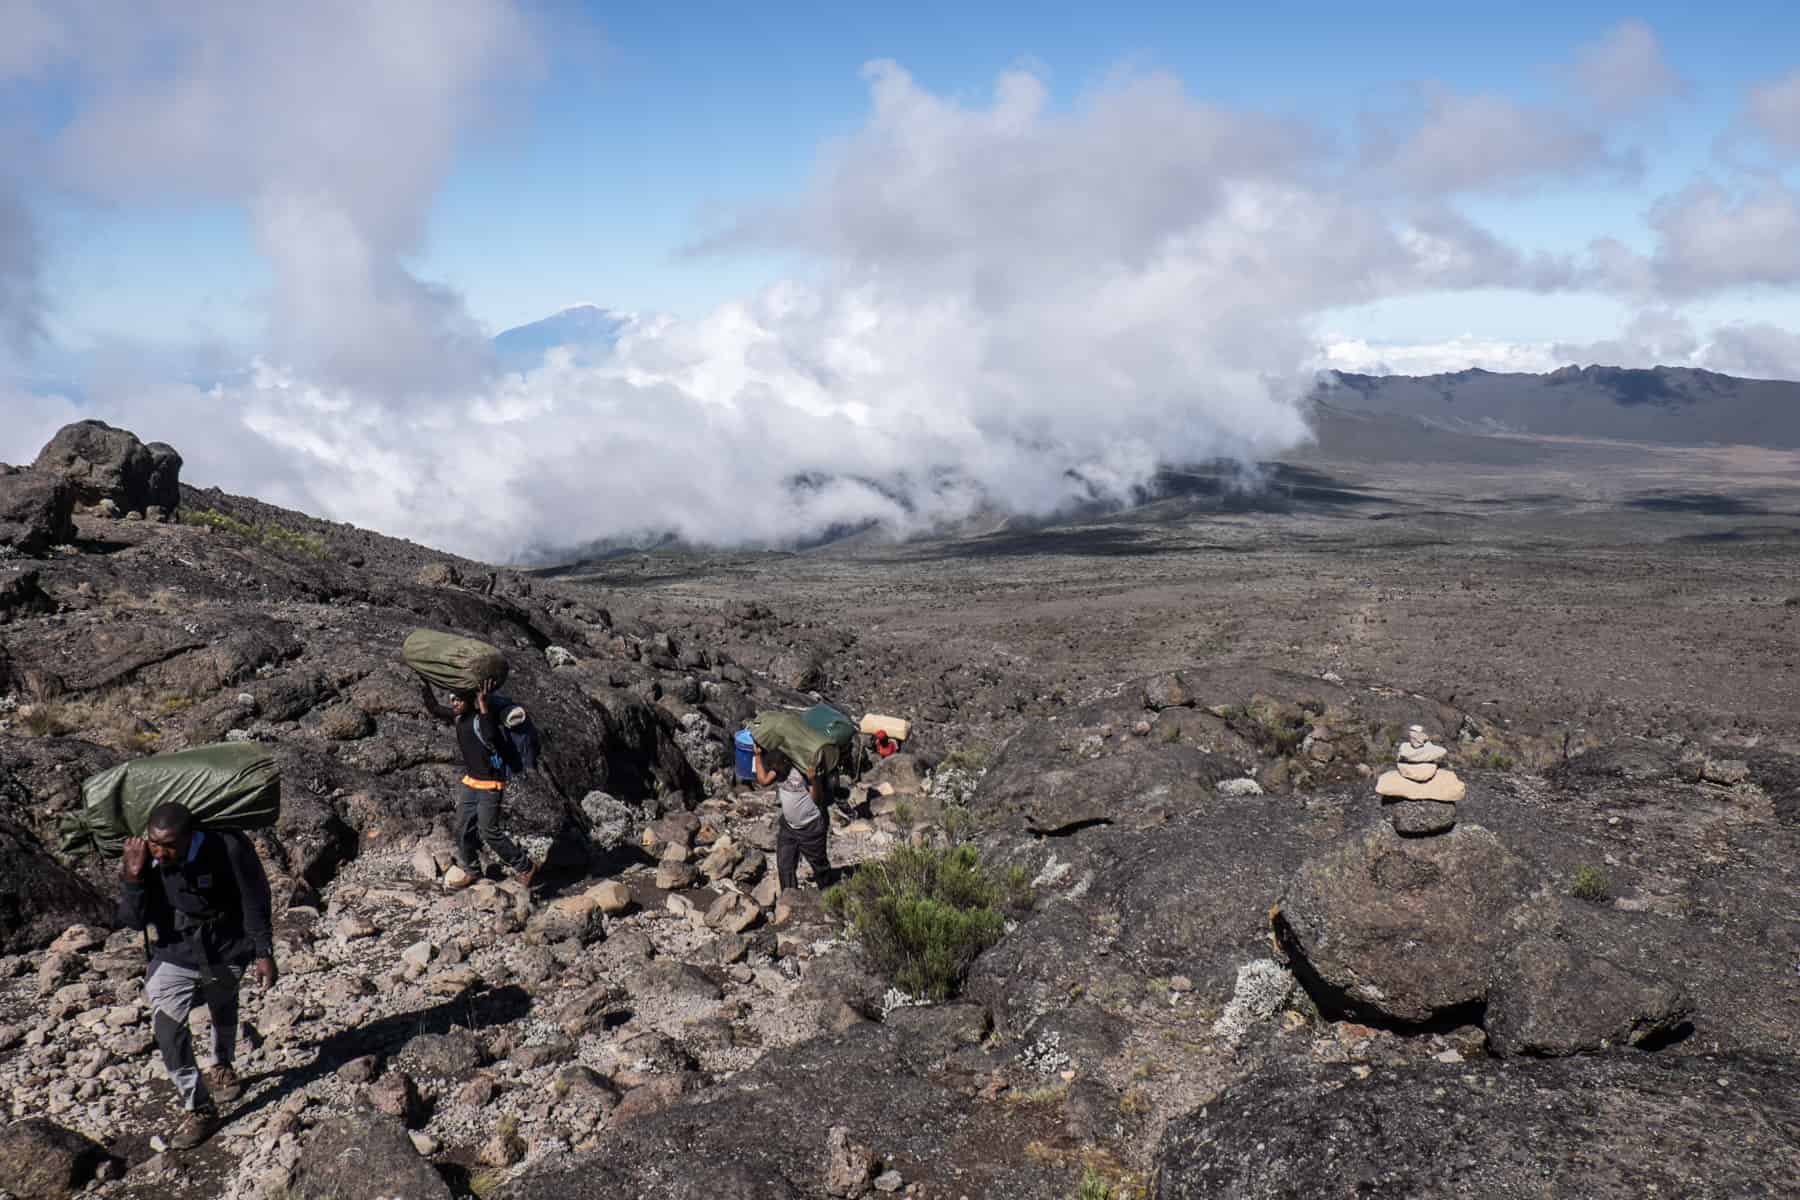
Are your porters well taken care of?
Experience and Success Rates
Your success at getting to Summit isn’t only about your physical fitness and your luck at the time with how altitude treats you.
It’s also about having a superb team with you who know how to read the mountain terrain and weather predictions and guiding each day precisely.
It’s about a team that knows how to read every passenger and immediately notice any changes that could compromise their health and safety.
It’s about guides who are with you every step of the way and don’t trek ahead and leave you behind, which I saw many times in other groups we passed.
It’s about having someone watch out for you, one-on-one, during summit night, noting your every move and feeling to ensure you make it to the top.
A Low Price Doesn’t Always Equate to the Best Service
Booking a Kilimanjaro trek isn’t cheap, and there’s a reason for that. Hired guides and porters ensure your safety at the risk of their own lives and should be paid fairly, and then there’s the cost of transport, equipment, permits, food and amenities.
Therefore, you must never compromise on the above things by being blinded by a lower price.
Is the equipment in good shape? Some treks with lower prices don’t have the best equipment, such as tents and tables, or a decent standard of food.
What size of the trekking group? Treks can have a lower price because of larger trekking groups sizes. Ideally, you want no more than 10-12 in your group to ensure you receive due care and attention.
Is anything extra included in the price of your tour? Check if the cost consists of a pre and post-trek hotel stay.
Is the trekking time shorter? Mostly, lower prices are because the tours claim to get you to Summit quicker, where the recognised minimum amount of time is short by one day. This reduction of time is a huge red flag and compromises on essential acclimatisation days needed for your safety on the mountain.
Finding Responsible Kilimanjaro Trek Experts
Climbing Kilimanjaro Tours
I travelled with G Adventures because they are world-leading Kilimanjaro trek experts, with a continuous and high summit success rate amongst the 1,500 trekkers who trek with them every year. Alongside a high success rate, you also know exactly how far your money is going in supporting the locals in Tanzania.
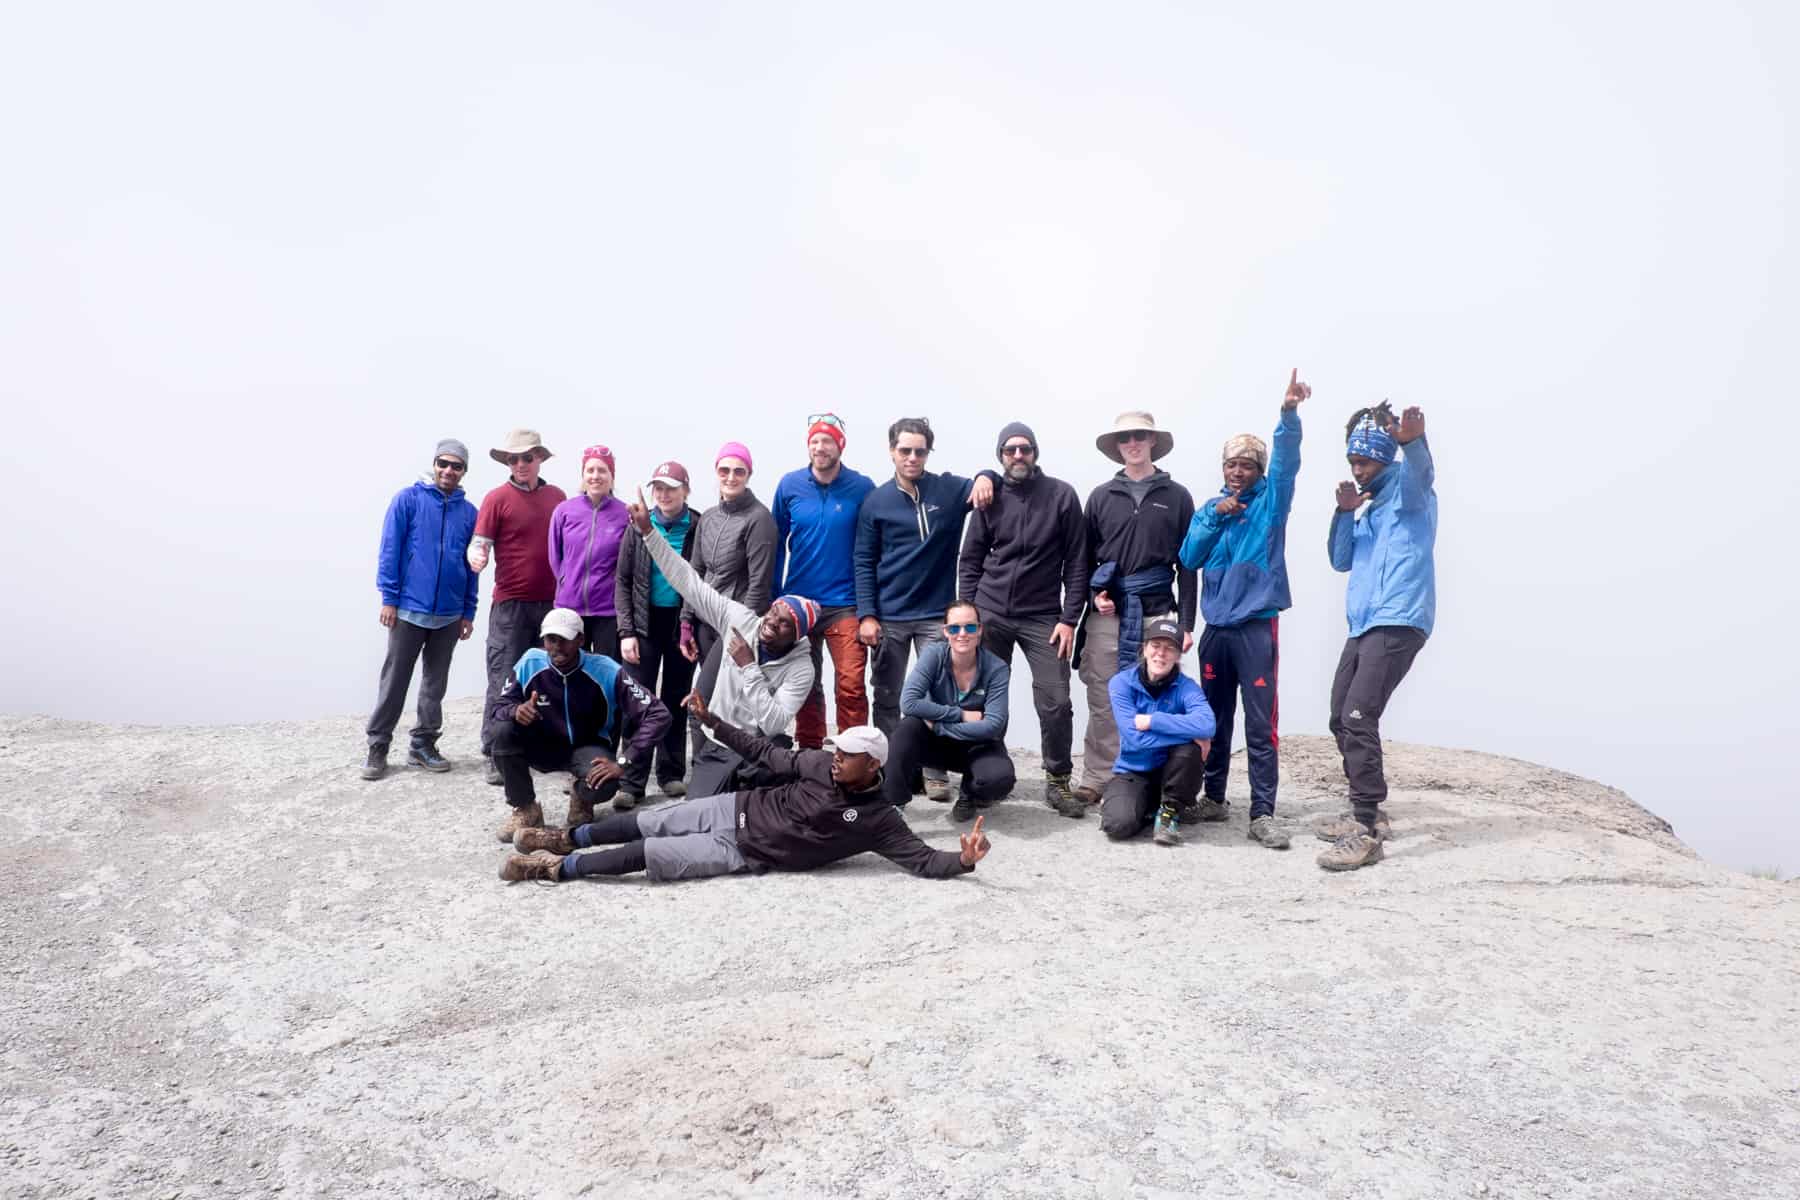
Trekking group and the “G Fighters” team – How it worked
An outstanding team of 35 guides and porters accompanied the 11 trekkers in our group. Every day the ‘G Fighters’ (as is the affectionate name given to them) carried all our camping equipment, mess tents, food, water and a 10kg bag from each person. It would have been 33, but with a unanimous agreement to hire a portable toilet for the duration of the trek at an extra cost, we were able to employ two extra porters.
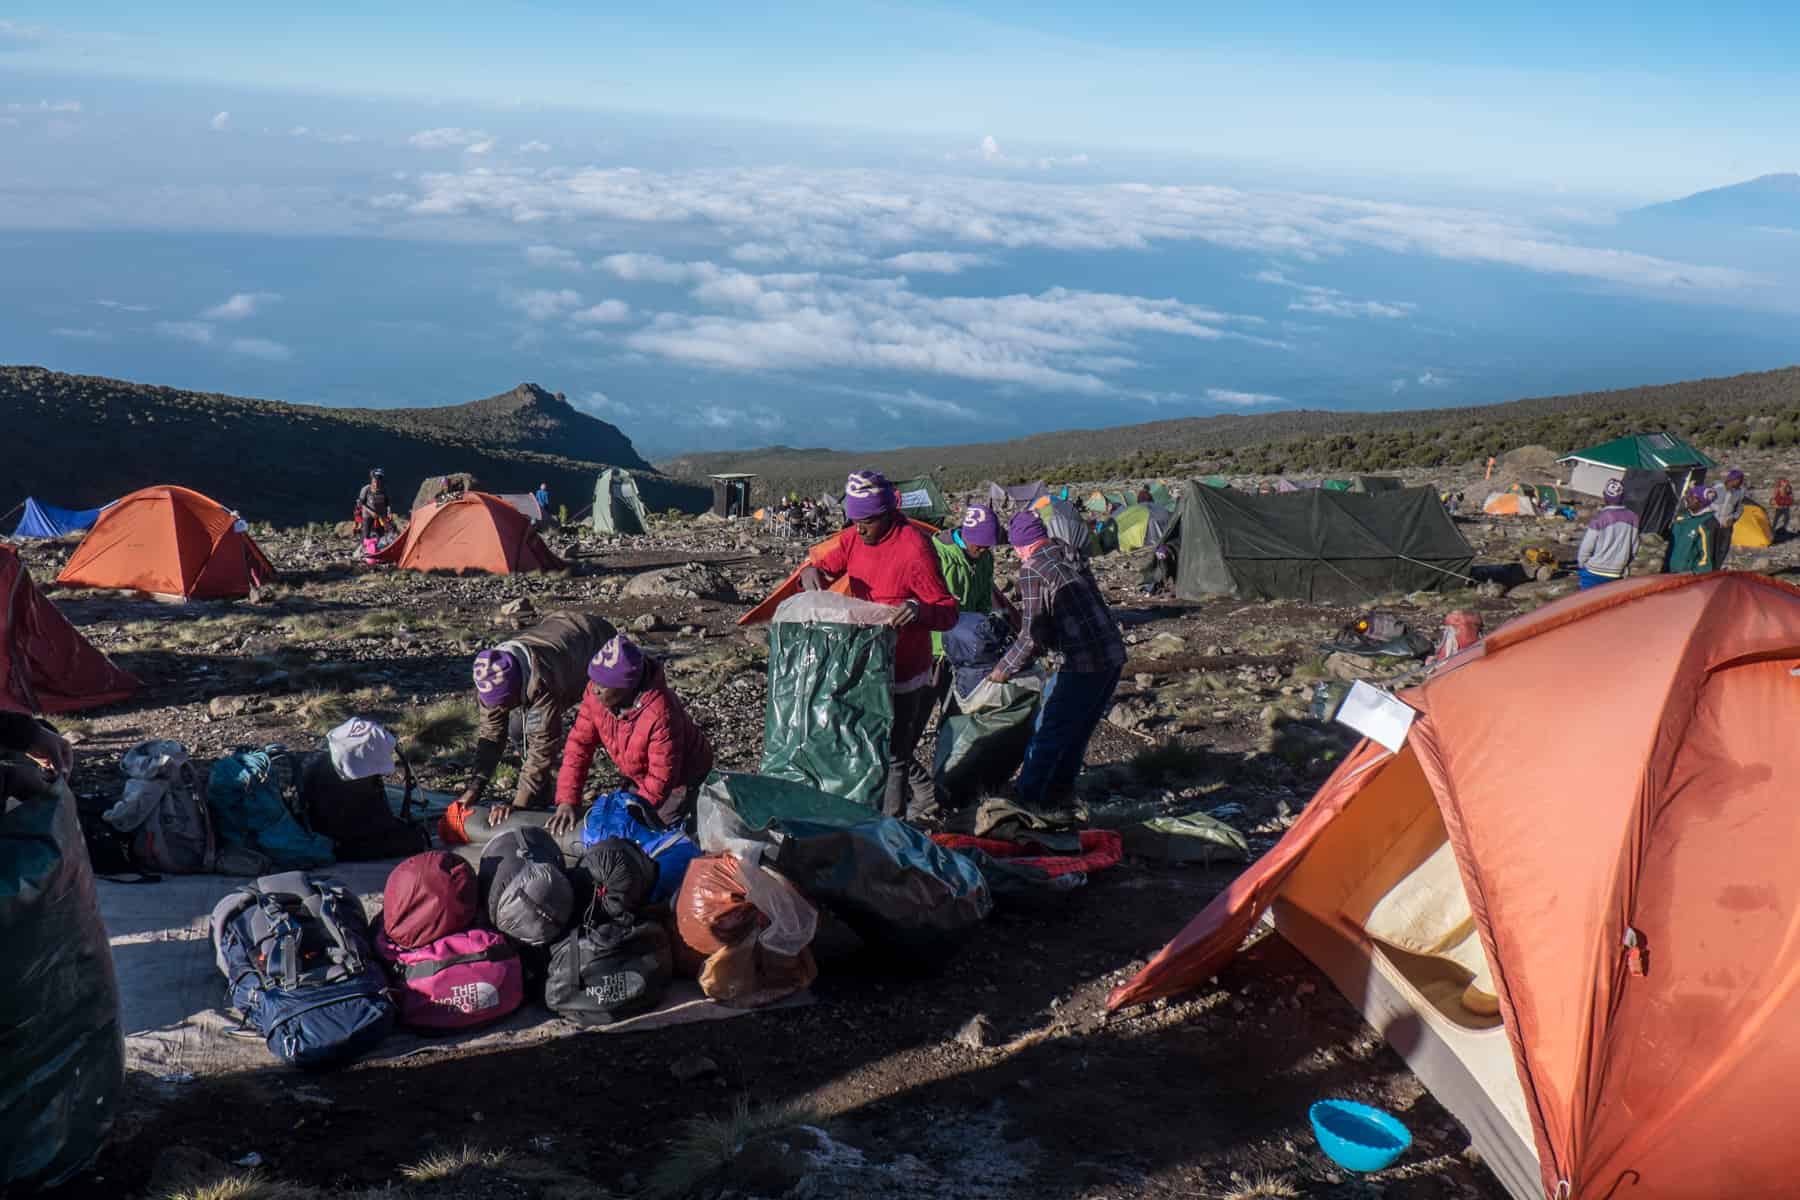
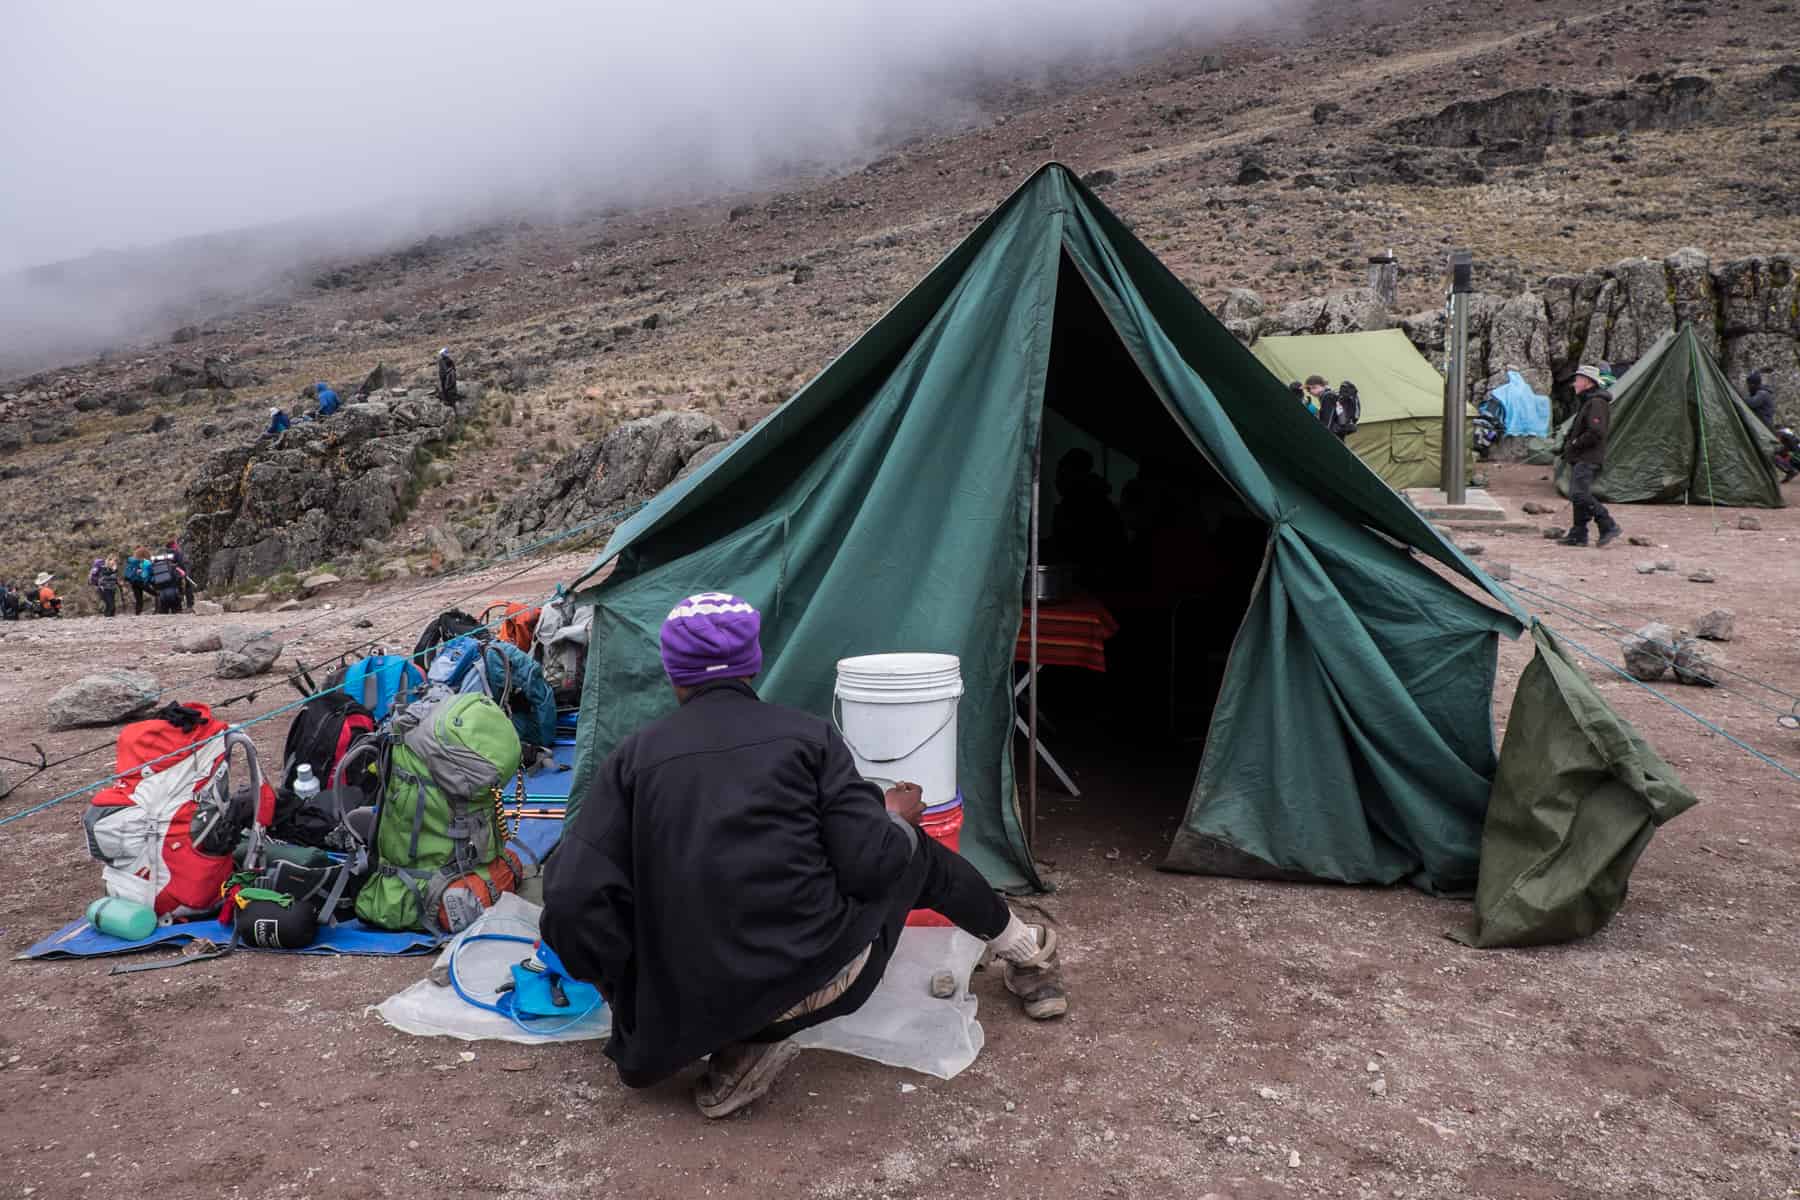
The porters are an invaluable part of your trek experience. By the time you leave camp, they’ve already packed it down. By the time you’ve reached the next camp, hours behind them, it is set up and waiting for you. Some would even walk back on the track to come and meet us, take our daypack from us if we were tired, and show us to our tents.

They brought us a hot drink and “washy washy” hot water every morning. Breakfast, lunch and dinner were hearty, well made, tasty and focused on maximum energy supply.
Incredibly, on Summit night, we were each paired with a guide or one of the most robust porters who would look out for us from start to finish in the return loop from Basecamp.
How Much Does It Cost to Climb Kilimanjaro?
Trek prices start from €2000-€2500 for the Marangu and Macheme routes. Since they are the shortest routes, they tend to be on the lower end of the cost scale.
The Lemosho trek will set you back closer to €3000 as the tour is much longer, and therefore more staff need to be on the ground, and more essentials such as food are required.
The cost to trek Rongai is approximately €2400 – somewhere in the middle of the trek price spectrum.
Costs include Kilimanjaro National Park entry permit fees, camping permit fees and permit fees for porters, cooks and guides and the hotel stay on either side. Most of your money pays the wages of your mighty expert team, although you should also tip them at the end of the trip.
Can You Climb Kilimanjaro Without a Guide?
To climb Kilimanjaro, you must be accompanied by a licensed guide and legally follow one of the set routes on the mountain.
This rule, administered by the Tanzanian government and Kilimanjaro National Park Authority, became mandatory in 1991 to protect the environment and yourself.
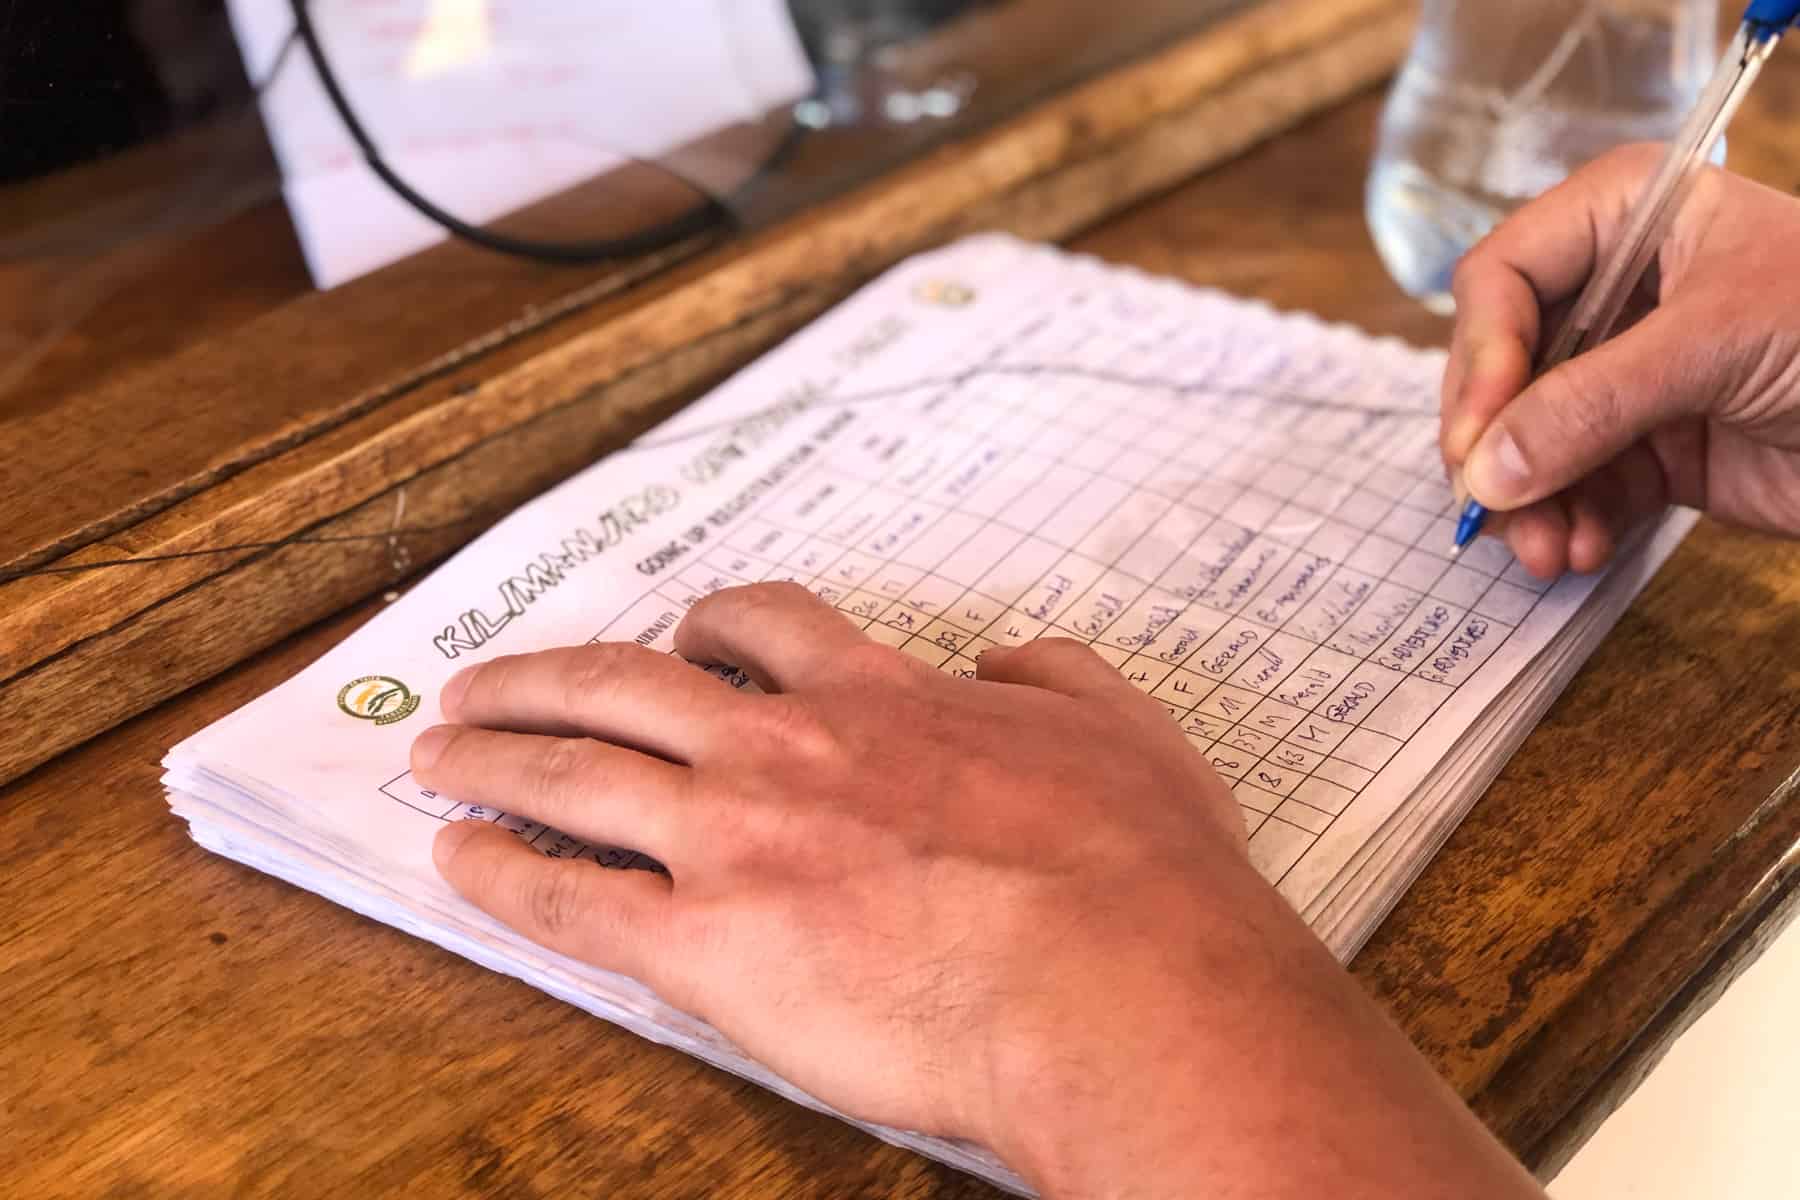
Don’t think trying to skirt this is possible either, as these rules are heavily enforced and monitored. At every camp, you will sign in and list your details, which includes the name of your guide and tour company. Everyone must sign in and out of the National Park with his or her trekking guides present.
Your entire teams of guides and porters are essential to the success of your trek. If your ego is too big for this realisation, trekking Kilimanjaro isn’t for you.
Preparing and Training for Kilimanjaro
How Fit Do You Have to Be to Climb Kilimanjaro?
Some people join Kilimanjaro groups as first-time hikers but succeed because they are in good shape and have done the preparation. Success depends on your physical condition and how your body reacts to altitude (often unpredictable). It’s not based on how many previous treks you have done.
How Much Training Do You Need for Kilimanjaro?
There’s no definitive answer, but many people train for 2-6 months before trekking Kilimanjaro.
Practice treks
We trained for two solid months here in Austria since we have more choices for different trekking grounds, including steep hills and hours-long circuits with varying elevations. If you are in the UK, consider a long weekend of training somewhere like the Lake District, with its pick of challenging but accessible mountain hikes.
Friends had blocked out time to travel to various parts of their respective countries to tackle some hikes in rugged terrain, or in the UK, for example, hiked Snowdon to get their bodies used to the feeling.
Other workouts
I also did at least two HITT workouts a week at home to build core strength and stamina, alongside the Yoga with Adriene ’30 Days of Yoga’ challenge, which helped with the control overall with my breathing with the altitudes of Kilimanjaro and the rhythmic pace of each day of trekking.
We also gave up alcohol for six weeks before starting the Kili trek, although this is not essential. It was a personal choice to be in the best shape possible.
Testing your gear
The trek training period is also the prime time to break in new hiking boots and test your gear, including waterproof layers, thermal layers and the weight of carrying water via hydration backpacks.
Packing for Kilimanjaro
With a 15kg limitation for the bag the porter will carry, plus the essentials bagged up in a daypack you carry, what to pack for Kilimanjaro can feel overwhelming. My Kilimanjaro Packing List covers my tried and tested trekking and camping gear, from hiking shoes and clothing to essential accessories and electronics.
Vaccinations and Malaria Prevention
There is no risk of malaria when climbing Kilimanjaro since you won’t typically find mosquitoes above 2000m or so.
However, there is a high risk on the ground in Moshi before and after the climb.
Therefore, it becomes a precise process of when to take your anti-malaria medication. You have to start taking it one or two days before entering the malaria area of Moshi, yet only a day after arrival do you begin trekking Kilimanjaro.
Whether you continue to take antimalarial pills beyond the first day of trekking and while on the mountain is a personal choice. We stopped and then restarted them on the last day we were coming down.
Give yourself at least two months to organise your vaccinations. You will need Hepatitis A and B, rabies, diphtheria, tetanus, polio, typhoid, and a yellow fever vaccination before travelling to Tanzania. These are usually administered over a few weeks if you haven’t had them before or need boosters.
Tanzania Visa
You will be required to get a single entry ‘Ordinary Visa’ (valid for three months upon entry) for Tanzania for your Kilimanjaro trip, and you can quickly get this online at the Official Tanzania Immigration Services Website. You need a valid passport (of at least six months), including one free page for visa stamps on entry and extra.
An Ordinary Visa (Single Entry) costs $50. Applications can take up to 10 days to be approved, so give yourself plenty of time in case of any issues or if you need to resubmit your application. You will receive an e-mail with a User Identification Number from which you can keep track of the progress.
Get Travel Insurance That Includes Trekking
You must have a travel insurance policy covering the usual elements like damage, in-patient medical treatment and repatriation, but also one that covers mountain ascents and rescue.
Check the fine print since many policies state a mountain pass limit, commonly “up to 2,500 metres” or “under 5,000m”. You may need a separate insurance policy or an activity/sports add-on, which includes trekking up to 6,000 metres.
For climbing Kilimanjaro, you will need an insurance policy that covers
- Treks up to the height of at least 6,000m.
- Mountain Rescue by Helicopter/helicopter evacuation.
How to Get to Kilimanjaro
To get to Kilimanjaro, you need to fly into Kilimanjaro International Airport (JRO), located right in the middle of the two towns of Moshi and Arusha.
Moshi is the town closest to Mount Kilimanjaro National Park and is a 50-minute drive from Kilimanjaro airport. You can usually arrange a pick up via your tour company, or arrange a taxi via your hotel starting point.
It is a good idea to arrive early with plenty of time to rest before meeting your group. You will want to be present for the full briefing and last-minute preparations.
Kilimanjaro Trekking Tips
How Do You Prevent Altitude Sickness on Kilimanjaro?
There is no miracle cure for an aversion to altitude. In the worst case, it can be severe and result in death, but in most cases, it just makes you feel sick and lethargic and can cause pounding headaches.
Everyone reacts differently or unexpectedly, but there are some ways to help prevent altitude sickness on Kilimanjaro.
Go slow – Pole! Pole!
Taking slow, measured steps during the trek to Kilimanjaro is as important as staying hydrated to prevent altitude sickness. Trekking is not a race or an opportunity to show off your sporting prowess – altitude can cripple even the most athletic.
You’ll regularly hear the Tanzanian “Pole! Pole!” meaning slowly-slowly, and while it feels strange at first, that pace needs to become second nature so that you do not overexert yourself at higher climbs.
Drink plenty of water
Drinking a lot of water daily – around 2-3 litres – is essential. Each day we were assigned an ideal amount of water to drink according to how many kilometres and hours we would be trekking.
Always Rest
You tend to leave each morning around 7 am and arrive at each camp in the early afternoon – and there is a reason for it. You need plenty of hours to rest, lie down and not overexert yourself at a higher altitude. What might feel like a long time to essentially “do nothing” is paramount for your overall success.
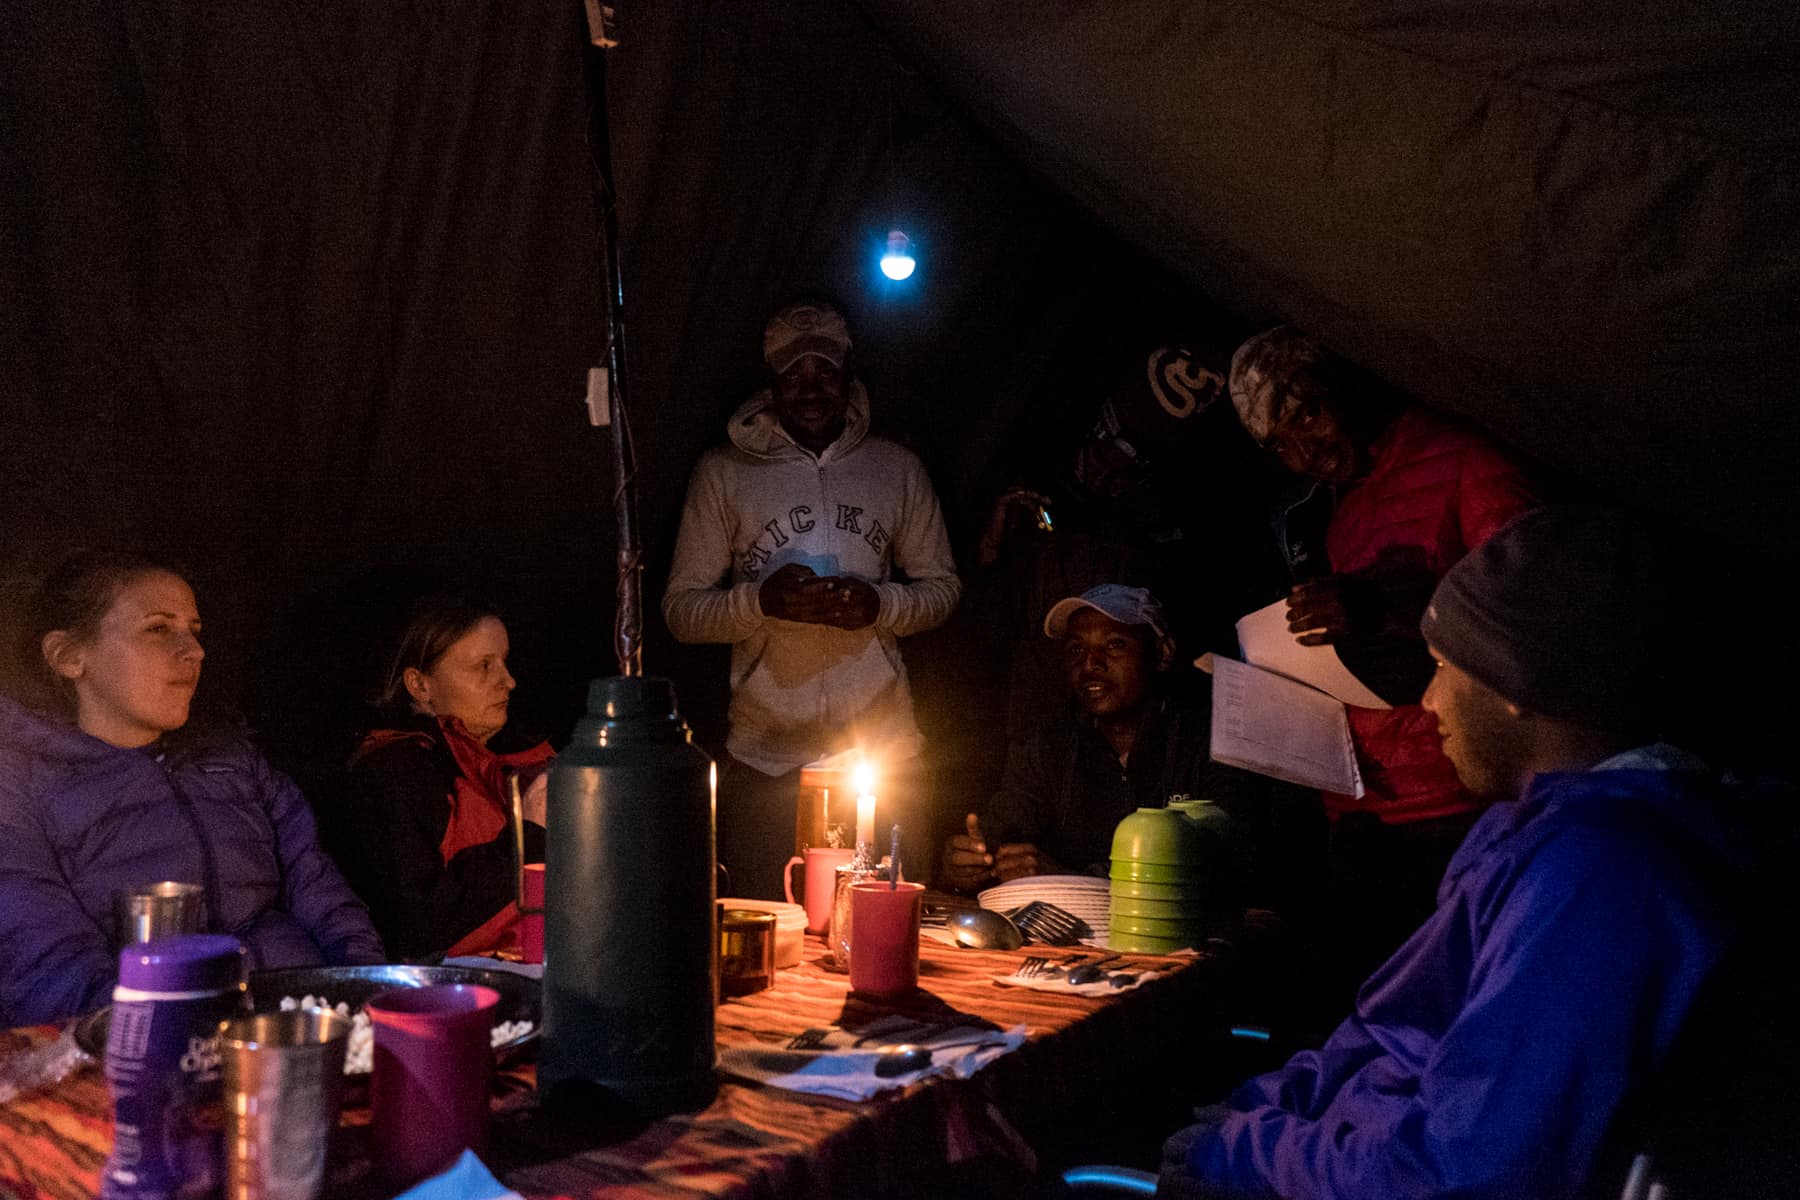
Daily health check-in
Every evening at dinner, we would go around the table and state how much we drank, how we felt and check our heart rate and oxygen levels with a finger pulse oximeter. Logging our vitals was a part of our daily health monitoring regarding progress or deterioration.
Try to eat, even if your appetite wains
Another way of detecting when altitude is affecting you is with appetite. Your appetite will proportionately decline as altitude increases. However, it’s essential to try to eat what you can, even if the only thing you can stomach is chocolate for a little energy boost.
Your body needs everything it can to deal with the thinning air. Even getting dressed and putting your boots back on in the morning becomes more challenging, and you often feel like you have to pull your body with each step once you are higher up.
Garlic Tablets
I spent a long time reading about the benefits of garlic tablets for altitude sickness and tales of garlic soup on high-altitude climbs. While I wouldn’t say my daily Garlic tablet supplement ultimately saved me, Garlic does help to thin the blood and enhance its levels of oxygen in the body, and therefore it might have certainly helped.
Taking Diamox for Kilimanjaro
I chose not to take Diamox/acetazolamide when trekking to Everest Base Camp, although I did have to take some two days before getting to the base camp summit or I wouldn’t have made it.
Since I am both a migraine sufferer and have a pre-existing condition – asthma – I have always tried to avoid altitude sickness drugs since they effectively mask effects and what your body is trying to tell you.
When planning for the Kilimanjaro climb, I had an instinct that I wanted to take Diamox. We both went to the doctor and talked through the options and given a prescription – for two tablets, taken daily.
After chatting with our Kilimanjaro guides, we soon learnt that one tablet a day was enough – half a tablet in the morning and the other half in the evening. It meant not overloading our body with Diamox, and still retaining a greater sense of feeling.
It’s a very personal choice. Some people in my group, like us, took it the entire time; others took it halfway through the trek, while one woman chose not to take it at all and still made it to Summit while feeling wretched.
I would advise having it with you and discussing the options with your guide. Have it for safekeeping in case you need it later.
Prepare Mentally for Mount Kilimanjaro
A trek of this magnitude isn’t just about physical fitness. Rough day-to-day aspects of it can quickly overshadow the rosy, rainbow-filled picture of glorious hikes in mountainous lands.
With Kilimanjaro, camping can get to people, especially if you’ve never slept in a tent before. When the nights get cold and uncomfortable, it can push anyone’s limits. The stingingly cold weather and drenching rain downpour can strip out your positivity since there’s no way to dry off. The food can feel monotonous after a while and merely craving a comforting, wholesome meal makes you cranky. Someone in your group might start grating on you more than you would otherwise notice, and in your one mess tent and small camping circle, it’s hard to escape.
In short, you must do everything you can to make yourself feel better.
Pump yourself up with positive thoughts before you begin. Calm the nerves and think only of the greatness of the journey. Know the beauty of nature and the glory of the climb with these pre-trek encouraging mountain quotes. Choose one and let it power you.
Approach each climb thinking of the spectacular endpoint. Know that every excruciating last step is worth it. Remember why you are doing this.
Be patient, and don’t expect instant gratification. The first few days may seem a little unstable, but you will soon form a routine, know what to expect, where your strengths lie and where to ask for help.
Know that having mixed emotions is ok. You’ll move from feeling fine and energised, to sad and moody, to bored and unhopeful, all in one day. You have to use a lot of mental energy to pull yourself out of it.
Bring your favourite things for comfort. Bring a book for the hours-long rest; bring your favourite snacks and large bars of chocolate. Fill your phones with motivational playlists and downloaded movies.
Remove yourself from negativity and annoyance. Walk away from people who are negative or do the simple thing of standing in a different part of the trek line from them.
Avoid asking, “how much longer?” or “are we nearly there yet?” We all did it, and the guides know how to word the answers to keep morale. You are told the night before about the next day ahead and average timings. Overall, I found it helped not to wear a watch.
Rely on the camaraderie of the group. Whether through singing songs, forming in-jokes, having chats about life as you get to know one another, or playing cards in the evening, your group morale is invaluable for your mentality.
Every day the chant was: “One team, one dream! Non-stop, to the top!”
What Else to Expect When Climbing Kilimanjaro
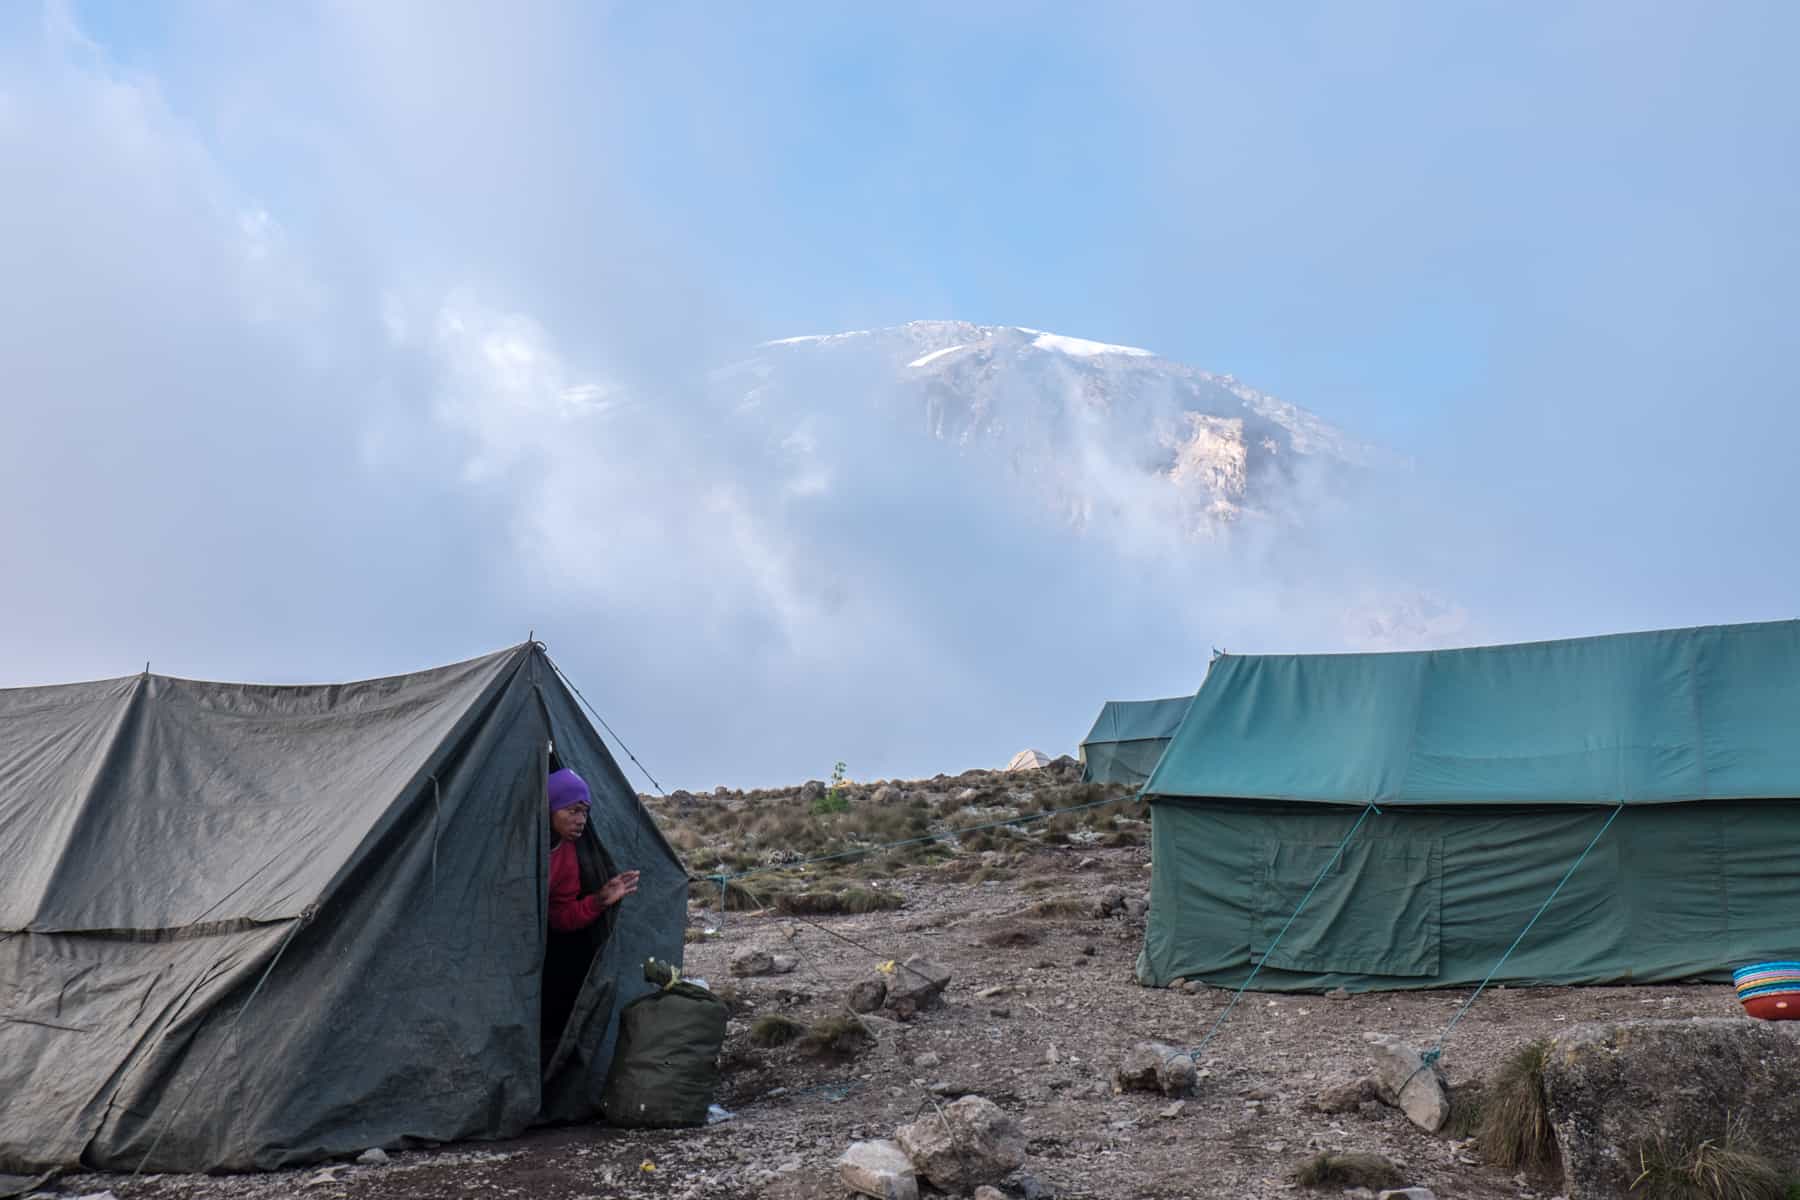
Camping, Hygiene, Toilets and Water
Camping can get tiresome and rough during your time on Kilimanjaro, but it is also the main thing you need to get used to quickly. You camp with two-person tents assembled and dissembled by the porters. Each tent has a number, so you use the same tent and padded sleeping mats for the entire trek duration. Overall, this ensures a dedicated level of hygiene and peace of mind.
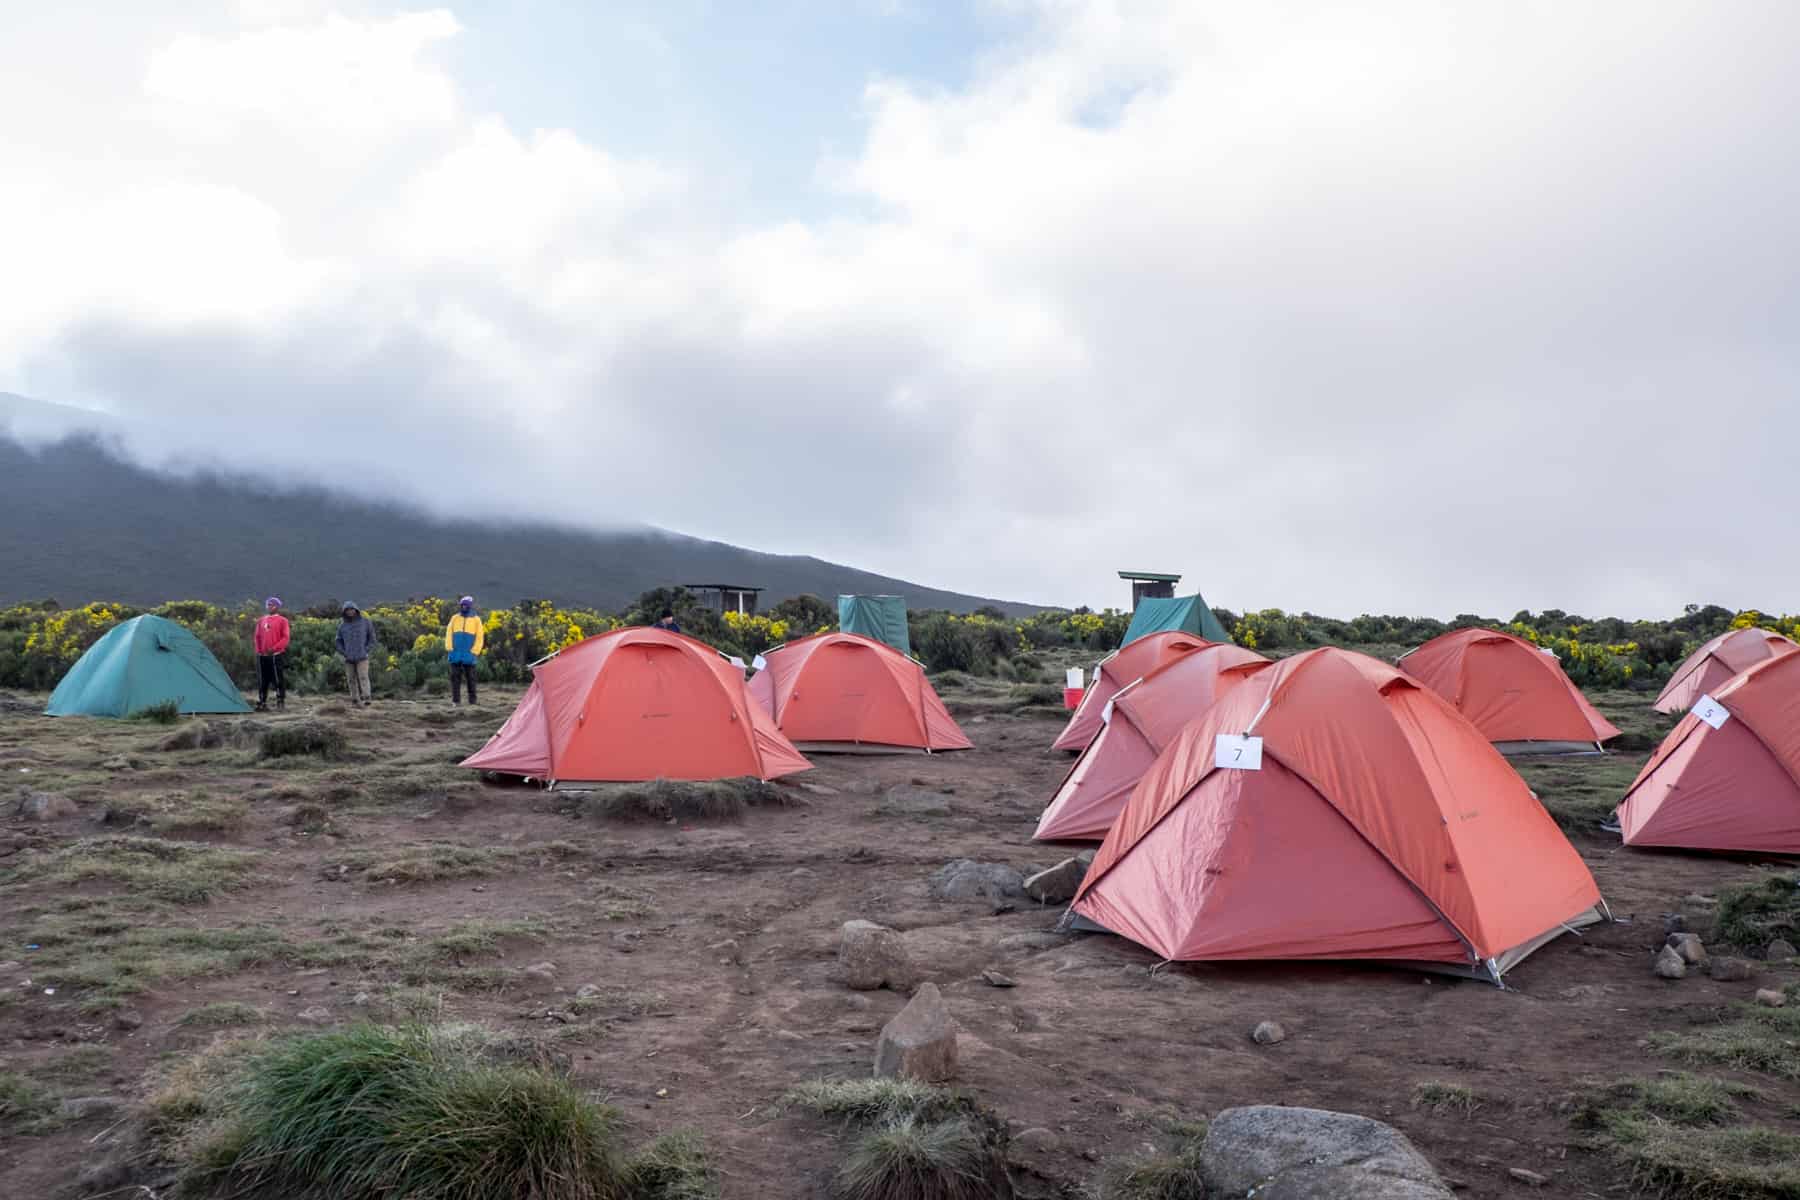
Get used to the fact that you will not be showering until you return to the hotel for the most glorious cleanse of your life. You get given a bowl of hot water in the morning and evening for washing, and it’s worth bringing baby wipes and a microfibre towel to feel as clean as possible.
We paid to have two portable toilets for our group, which saved having to rely on the gross long-drops found at the camps – which can be quite a walk from your group camping spot. Paying extra for the toilet is worth it for the overall morale of the group and general comfort.
On the trek, there are no toilets, only nature, affectionately dubbed “sending a message”.
Porters always carry water, providing daily drinking water for the trek team, topping up at any water sources we pass and using water purification tablets that kill microorganisms in the water. Water is readily available during meals and in the morning for the essential refill before the day’s trek.
Is there an Internet connection on Kilimanjaro?
Seriously, embrace the digital detox and enjoy the incredible landscape you find yourself within during this once-in-a-lifetime trekking experience. There might be a little signal, should you have a local Simcard, but it’s unnecessary.
What is the food like on Kilimanjaro?
There’s no denying that the food on Kilimanjaro does feel repetitious after a few days. However, our daily breakfasts, lunches and dinners were tasty, prepared with care, and every need was taken care of, even if someone was vegetarian or had an allergy or intolerance.
Breakfast consisted of a bowl of porridge, pancakes (with jams and peanut butter), and an omelette with added filler such as sausages.
Lunches and dinners were a course of vegetable soup, and then the main dish was made up of rice or pasta, vegetables and potatoes. Lunch after the famous Barranco wall was chicken and chips, and the group was delighted. You don’t realise how good a real hearty, comfort meal is until you have it after an arduous day.
Snacks were plentiful, including popcorn and biscuits, alongside a steady supply of tea, coffee, hot chocolate and our favourite treat – ginger tea.
Overall, Is the Kilimanjaro Climb Worth It?
Commercial as it has become, climbing Kilimanjaro is unmistakably worth it, especially for regular trekkers looking to up the ante and on the Lemosho Route that gets you a little off track to the more trodden routes.
Kilimanjaro isn’t an easy climb, and it never will be. Not everything achievable is easy, and it’s OK to say Kilimanjaro is quite the feat to endure and overcome. That is typically a strong basis for trekking – the pain brings reward. And with Kilimanjaro, you are rewarded with one of the most scenic and highest mountain summits in the world.
What to Do After Climbing Kilimanjaro? Beach and Safari
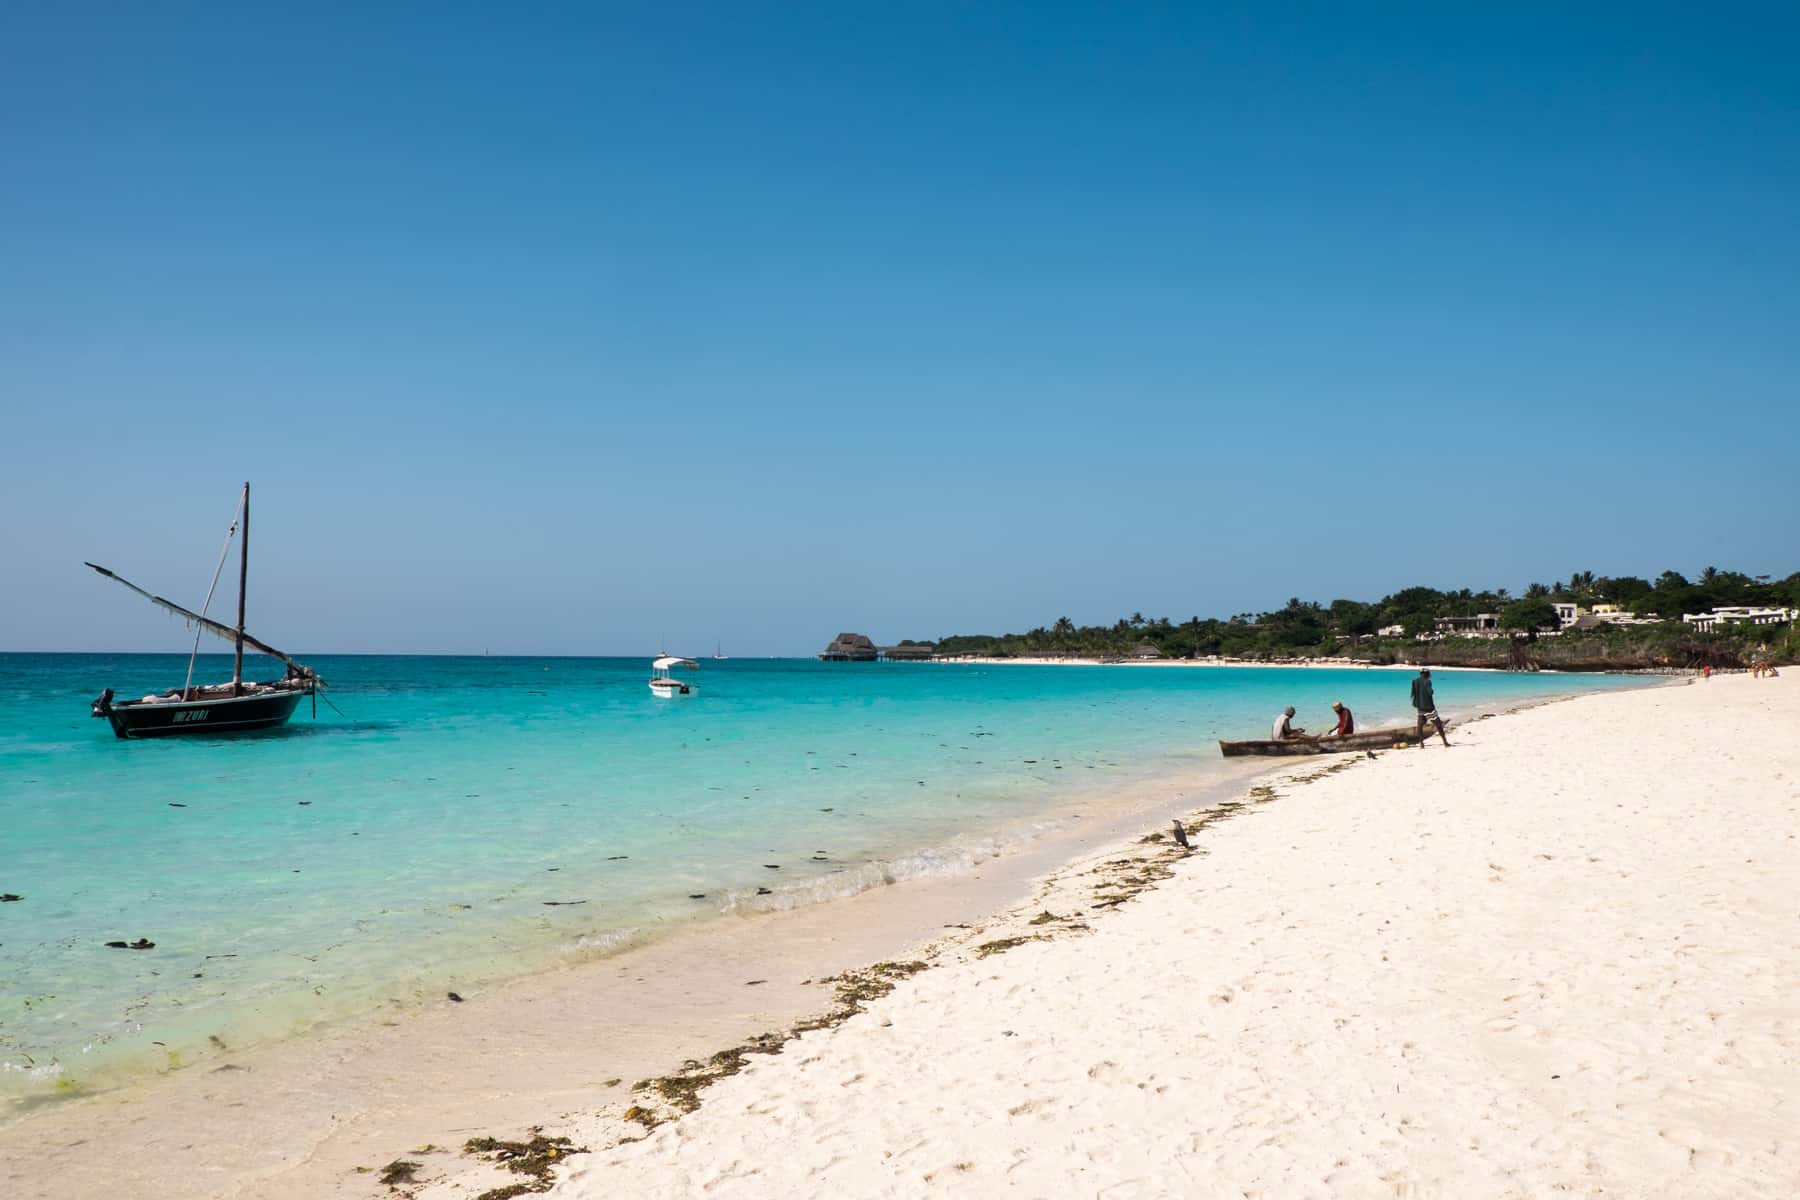
Zanzibar Beach Time
We went to Zanzibar before our Kilimanjaro time, as our flight route was cheaper to get from Europe to Zanzibar and then to fly in Kilimanjaro airport, although, in hindsight would have preferred this downtime post-trekking. Some members of our group chose the Kilimanjaro to Zanzibar trip and relished the relaxation.
We spent two days uncovering the millennium layers of history in the architectural labyrinth of UNESCO Heritage Stone Town, where African, Arab, Indian and European cultures intertwine, before heading up to the island’s northern beaches for the day – said to be the most beautiful on the island.
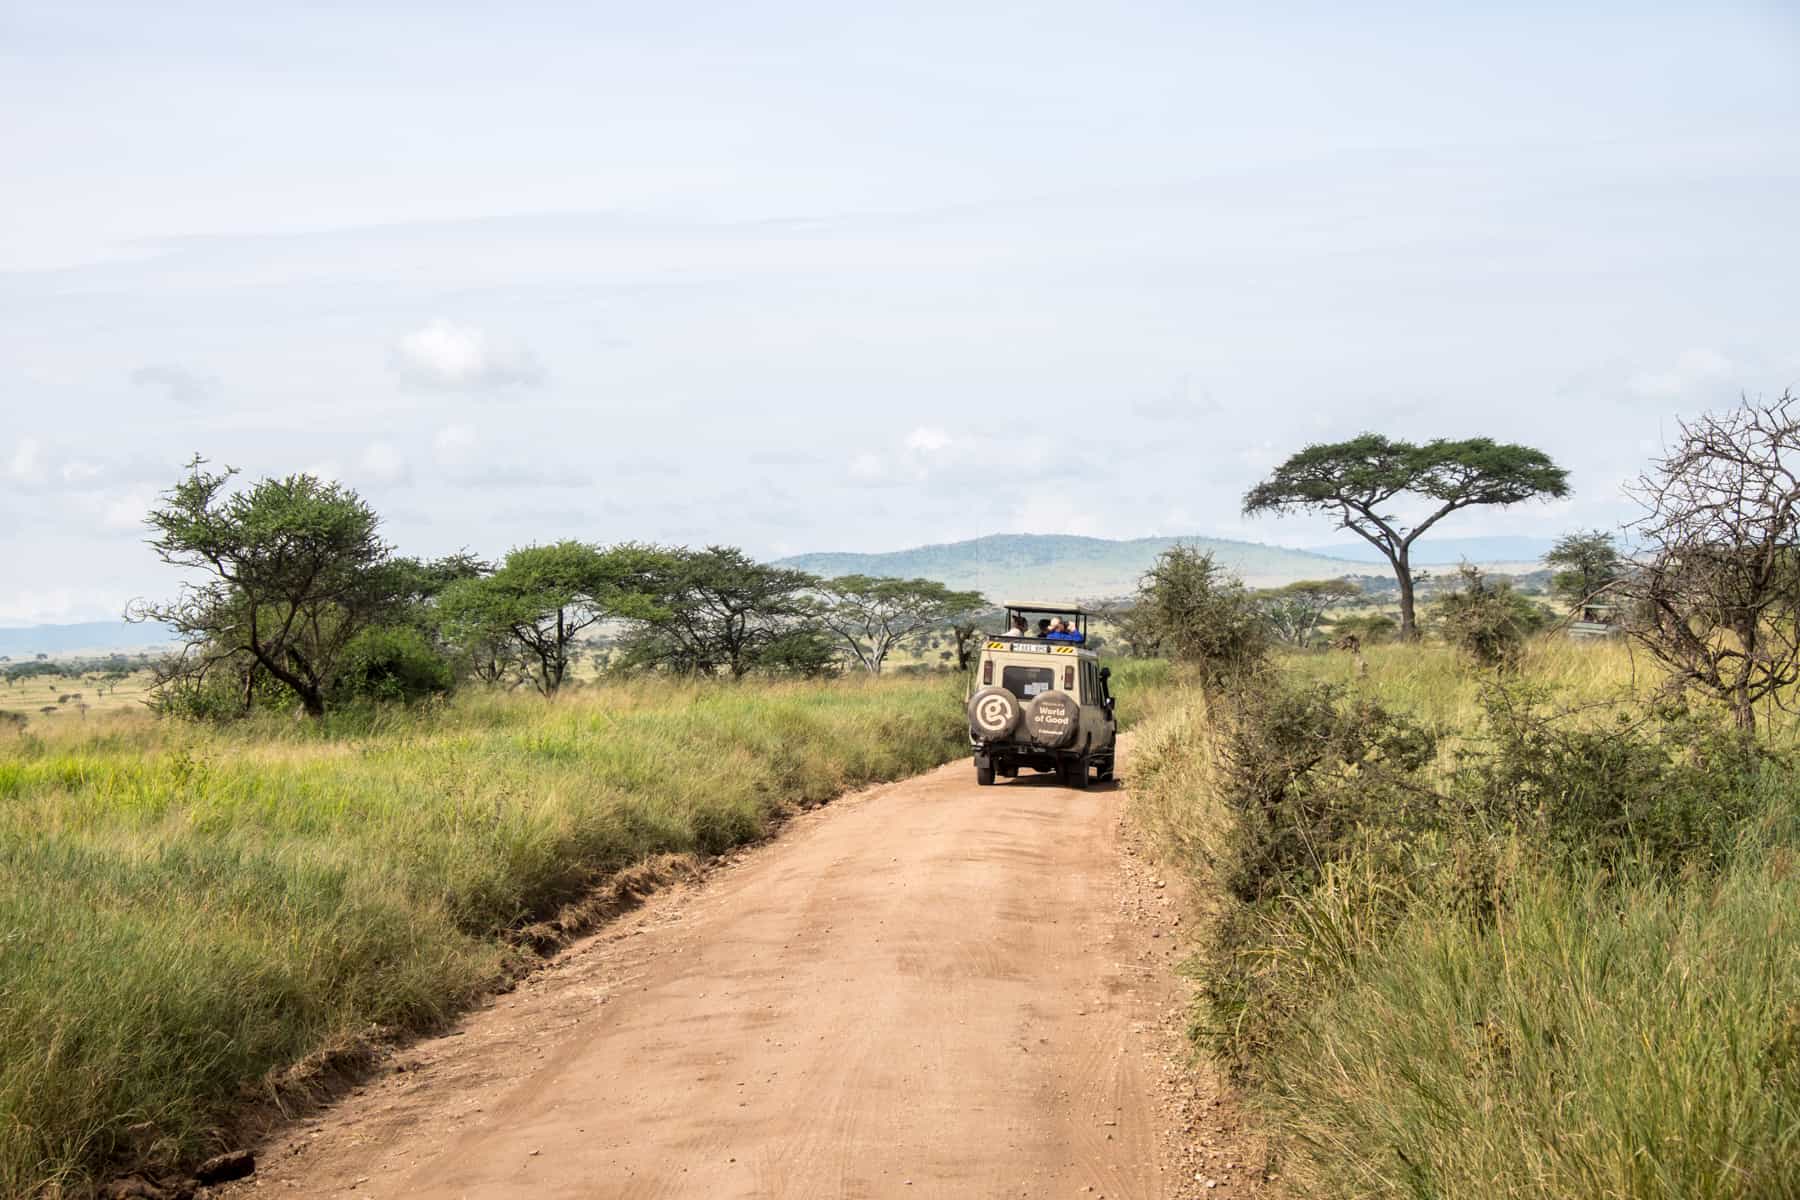
Serengeti Safari
As part of our trek-safari combo-tour, we headed straight to Arusha after Kilimanjaro to embark on the long, scenic drive into the centre of the Serengeti. The trip starts with a visit to Mto wa Mbu village and the opportunity for locals to introduce us to this multi-cultural area where over 18,000 residents from 120 different tribes reside.
Our drive into the wildlife parks began with the grassy flood plains of Lake Manyara National Park Safari on the western wall of the Rift Valley, patched with acacia and mahogany woodland and a haven for birdwatchers. The Serengeti is a vast savanna, spread so wide that you will never reach its outer edges without spending days on the road. You wild camp for the entire trip, to the distant sound of a lion’s roar and the footsteps, sniffing and shuffles of buffalos and hyenas curiously wandering around at night.
We came full circle back to the epicentre of the Ngorongoro Crater before camping on its rim. The water pasture of the Crater floor provides the ecosystem support for over 20,000 to large mammals and a chance to spot more zebra, prides of lions, hippos, and, if you are lucky, rhinos.
Our trip ended with a visit to a Maasai village to see the social enterprise Clean Cookstove Project in action. Some 120 women have trained to install more than 4,000 stoves in more than 60 Maasai villages across the Serengeti, replacing traditional open-fire and fuel-burning stoves whose smoke pollution is the fourth biggest health risk in the world.


Charlotte Blackwood says
Thank you for this information lots of questions answered here.
Charlotte
Candice says
Holy smokes this is an incredible guide. Thank you!
Becki says
Thank you so much! Are you thinking of climbing Kilimanjaro in the near future?